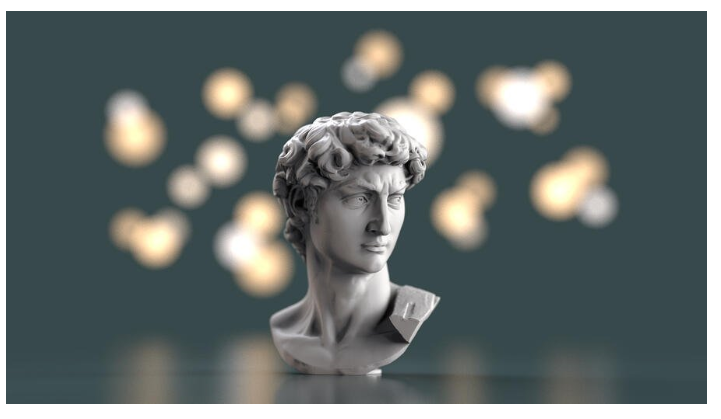
Today we’ll be looking at KeyShot's Depth of Field setting and the background blur effect called bokeh. We'll demonstrate how to set up a standard bokeh appearance, then use this to show how to create custom bokeh appearances using bokeh filters in KeyShot.
DOF, F-stop, and Bokeh in KeyShot
If you’re at all familiar with photography, own a camera, or have spent a little too much time browsing photographs, you have undoubtedly come across examples of photos using a dramatic background blur effect that photographers refer to as Bokeh.
Generally, Depth of Field (DOF) is noticeable in portrait or product photography where the subject of the photograph is separated from its background using a low/smaller f-stop, a setting which factors in your focal length and the size of the aperture opening that allows light in. A smaller f-stop causes the foreground subject to appear sharp and visible while the background lights, reflections, and highlights appear out of focus. It is here that the shape of the lens (and the number of blades in its diaphragm) determines how these background elements appear. This appearance is referred to as Bokeh.
While, traditionally, bokeh appears as a round or hexagonal shape, there are ways to create custom bokeh in any shape you desire. And, since KeyShot functions much like a real camera, recreating a standard or custom Bokeh effect in KeyShot is incredibly easy. Let's take a look at how it's done.
Before we jump in, we would like to give a big shout out to 4KD who shared this process and the results on the KeyShot forum. It's always inspiring to see how KeyShot pros are using the software for a wide array of creative applications. Let's go through the process.
Standard Bokeh
Standard bokeh is the blurred shape of background light sources made by the shape of the aperture. This is typically a circular or polygonal shape, depending on the number of blades in the aperture's diaphragm. This can be achieved in KeyShot using simple light sources and DOF.
1. Place Model in Foreground
Now, to get started, place your model in the foreground of your scene and light it accordingly. At this point, choosing a darker environment may best highlight the Bokeh effect you create. However, if you need a daytime or brightly lit scene, a bokeh effect is still achieved with the same process.
2. Add and Position an Emissive Sphere
Now, to make a simple, circular bokeh effect, first add a sphere by selecting Edit, Add Geometry, Sphere. Then, position the sphere behind the model in the scene but still visible and apply an Emissive light material to it. In the example, we're using a warm emissive light since most we want a warmer tone.
3. Enable DOF
Next, go to the Project window, Camera tab and enable Depth of Field to both dial in how much f-stop, Focus Distance, and determine if the position of the sphere needs adjusted. If you find that there isn’t enough focus differentiation between your subject and the background light, simply move your lit geometry further away from the subject in the foreground. Once you’re happy with the effect the depth of field is creating, it’s now time to put your creativity to work.
4. Duplicate Lights
At this point, duplicate the same sphere and position them as desired. While you do this, you may adjust each sphere's scale, or the light's intensity and color to both add some variety to the scene and give the scene more depth.
There, up to this point you have a standard, circular bokeh, a highly flexible method in KeyShot to create bokeh of different shapes and sizes using KeyShot's default geometry but what if you want bokeh with custom shapes? This requires the use of a bokeh filter.
© Copyright 2000-2026 COGITO SOFTWARE CO.,LTD. All rights reserved. 京ICP备09015132号-52