Once we have the basic layout, the next step is to move each row on the Z axis to form a conical shape
Once we have the basic layout, the next step is to move each row on the Z axis to form a conical shape. For this we will use an expression. If that word alarms you, don't worry! There's a misconception that Expressions in RailClone are programming. They're not, they're just a simple way of doing some maths and they give you access to a few values that aren't available elsewhere. For simple mathematical operations, it can also often be easier to create a quick expression than it it is to create a lot of nodes. Here's how they work.
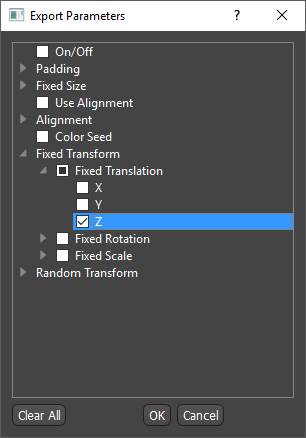
- First of all you need to export a parameter that you want to control with an expression. This is no different from exporting the Y Size of the array we looked at earlier in this tutorial. This time we will export the Fixed Z Translation from the Transform node.

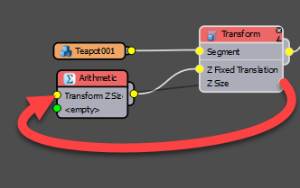
- Next create a new Arithmetic node, and and wire it to the Z Fixed Translation input. Go to the Arithmetic node's settings and change the Operation to Expression. To create an expression we open the editor by clicking Edit Expression.
- The expressions editor is divided into 3 parts. On the left hand side you have two tabs: Attributes show you all the values that you can use in your equations, there's no need to remember these because they are all listed for you; the other tab shows the mathematical functions you can use to go beyond simple operators like +,-,*,/ etc; again these are listed so you don't need to remember. them. To see more information about an attribute or a function just select it from the list and information is displayed in the bottom-right panel. Here you will find a description and an indication of how it can be used. Above this you have the text editor where you can write your expressions.
- For simple expressions there are 3 parts you need to include. First of all, you should type return to tell RailClone to output the result of following expressions. Secondly you would enter you expression, it could be something as simple as 1+1. Finally each line needs to be terminated with a semicolon. So a typical expression might read:
return 1+1;
Let's try a real world example.
- We want to increase the Z offset by a set distance for each row in our array, but first of all let's add the all important return command.
return
- Next we need to find a counter that increases for each row. If we search through the list of attributes we'll find one called SegmentYCounter that sounds promising. If you click it the description reads "Segment's index along Y path". Perfect! To add the attribute to the equation you don't even need to type - just double click to add it automatically.
return SegmentYCounter
- Now we to multiply this by the distance we want each row to be offset. In order for segments to stack, this should be the height of the geometry. We could enter a value manually here, but then we'd need to change it if we swap or resize the segment. Instead it's better to extract the dimensions automatically. You can do this by right-clicking on any node and selecting Export Attribute. In this case we want to export the Z-Size from the Transform node.
- Wire this to the Arithmetic node's first input.

- To reference this value in the expression you just enter Input followed by the number of the input starting from 1 at the top. So in this case you would add * Input1 to the expression.
return SegmentYCounter * Input1
- Finally, don't forget to add the semicolon! The expression will read
return SegmentYCounter * Input1;
If you click Evaluate you should now see a stepping effect.
- This is looking good, but you'll notice that the first row is also stepped so the array is hovering above the ground. This is because the first row is being translated, and really we only want the effect to start from row two. You can achieve this by subtracting one from the Y Counter (which starts at 1) as follows:
return (SegmentYCounter-1) * Input1;
(The brackets are used to control the order of the mathematical operations).
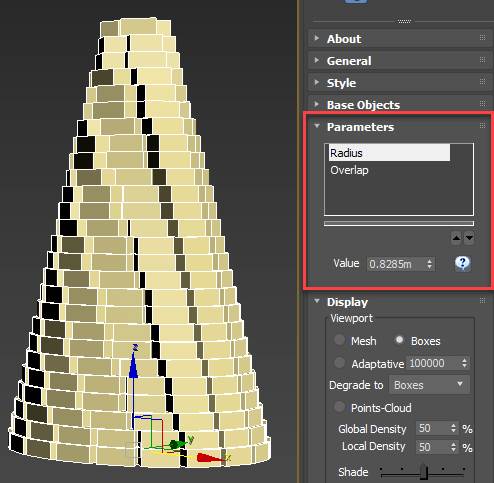
- That's the stepping effect complete! To finish this part of the tutorial, we just need to change the segments so that they are able to overlap and stack on top of one another. To do that we'll use the Transform operator's Bottom Padding value. If you enable Padding and reduce this value you will see that the rows start to overlap (and the tree gets taller too). We can make this easier to edit by Exporting the value and wiring it to a new Numeric node called Overlap. Make sure you set the Type to Scene Units. This value, like the Radius, can now be controlled from the Modify panel.


