Getting Started with Forest Pack Lite
Scattering and randomising trees
Now we’ll add the trees using the same creation technique. This time though we’ll import models from the library and by picking them from the scene itself. Unlike presets, 3d models and scene geometry do not include distribution information, so you will also need to configure several settings yourself to randomise the trees and set the density of your scatter.
1. Go back to the Create panel and select Forest Pro or Forest Lite.
2. Open the Library Browser and select 3D > Starter Library > Silver Maple 1 to load a free tree.
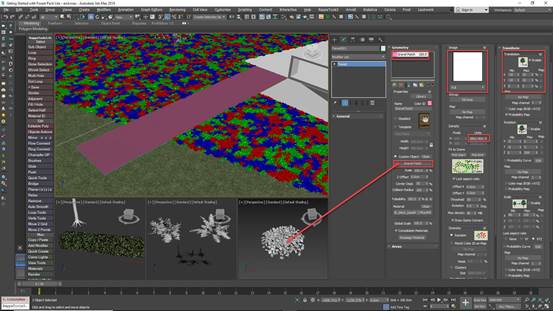
3. Click on a spline in the scene to be used as a scatter area.
4. To control the density of the scatter, go to the Distribution rollout. There are two important settings here: the image map which controls the Distribution pattern, and the Density setting which controls the size of the pattern projected onto the scene. Smaller values increase the density while larger values decrease the density.
5. Once you have the density set, you’ll want to randomise the Rotation and Scale to hide the fact that you’re repeating a single tree. To do this, go to the Transform rollout and enable Rotation and Scale. For many purposes the default settings are fine, but you can of course edit them to get exactly the desired look.
6. To further disguise repetition, you can add another tree model. This time, instead of importing an object from the library, we will select one from the scene. Go to the Geometry rollout and click on the + button to add a new item.
7. Change the mode to Custom Object and click on the Object Selector button. Find the object in the scene you wish to scatter and click on it. Forest Pack is now distributing two objects, the one loaded from the library and the new one selected from the scene. You can also control the mix of items from this rollout using the Probability settings.
Of course, it’s not necessary to start every scatter by loading something from the library. In the next part we will add gravel by building the style from scratch.

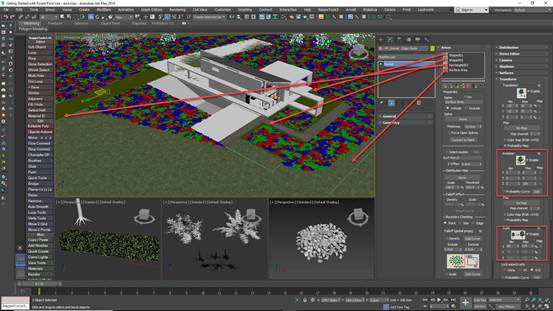
So far so good, to finish this style let’s go to the Areas rollout and add any other areas that are required. Remember, click the + button and pick the area from the scene. You can then choose if it is an Include area to add items, or exclude to remove them from an overlapping Include area.

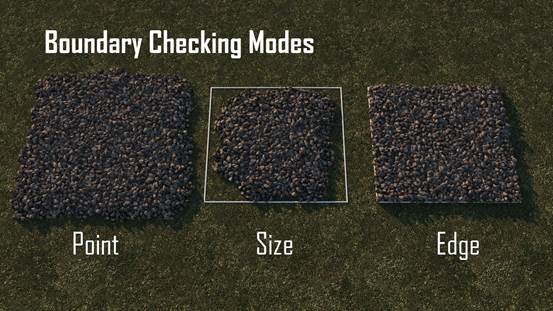
A very useful feature here is the boundary checking modes which are used to decide when an item is removed around the perimeter of a spline of surface. You have three modes: Point mode uses the items pivot to decide if it is inside an area, Size mode uses the size of the geometry itself, and finally, Edge mode uses the items pivot but then is able to remove individual elements that extend beyond the boundary. It’s great for getting nice clean edges.

© Copyright 2000-2025 COGITO SOFTWARE CO.,LTD. All rights reserved. 京ICP备09015132号-52