中文版English
Language
News
Your Location:Home>News>Company News>

Getting Started with Forest Pack Lite

In this tutorial, we will introduce some of the most commonly used features of Forest Pack Lite.

fullPost-5d09f3e4987f4

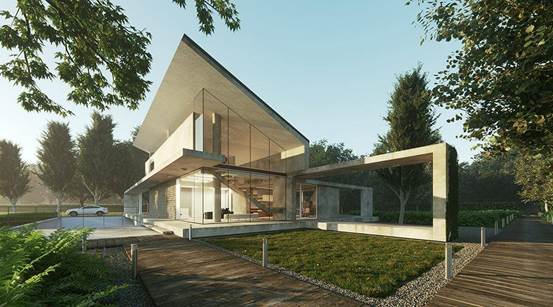
In this tutorial, we will introduce some of the most commonly used features of Forest Pack Lite. This is a completely free version of Forest Pack that includes a great many of the features of the paid version, can be used commercially and never expires!


To get the lite version to follow this tutorial, just go to the Forest Pack Product Page. The download link can be found at the bottom. Sign up for an account and you’ll be emailed a link to the software. Installing it is self explanatory, but you can visit the documentation if you need more help.  Once you’ve got the software installed, let’s jump into 3ds Max and start populating this scene with grass, trees, hedges, gravel, ferns and more. At the end of the tutorial, we’ll also take a quick look at using RailClone Lite, which is also free, for the boardwalk.


This tutorial was created in cooperation with Ciro Sannino and GC Edizioni for a new book called Chioroscuro with V-Ray.  With 15 chapters of explanation and exercises, this book describes an easy-to-repeat photographic approach to rendering that teaches a '5-Step Render Workflow' and the application of Chiaroscuro concepts to create artistic lighting. The book is in Italian with an English version due out in May.
step1

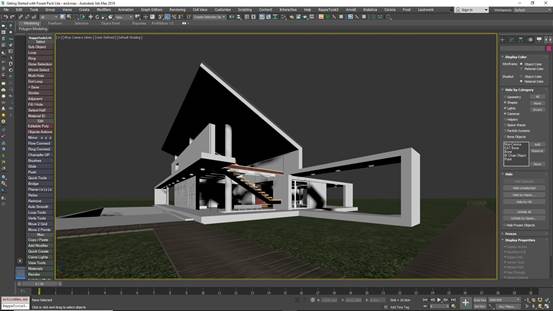
The Starting scene with Forest Pack or RailClone objects


Defining Areas for Forest Pack

To use Forest Pack, you define simple areas that are used to distribute objects. Several types are supported, including splines, surfaces, paint areas, marker objects and, in the pro version, particles.  Rather that provide a long description of how to create every spline, let’s just take a look at what was used in this scene. I’d encourage you not to try and recreate this exactly, instead you should experiment and create your own interpretation.


Areas


With that in mind, in this scene we had:

  • A large spline encompassing the whole site, for the grass, plus another couple of rectangles for separate lawn areas.
  • A spline for the gravel areas in the foreground and another for the driveway.
  • A large spline to add trees outside the perimeter of the site.
  • Several open splines are used to create the hedges around the site.
  • More open splines to add the lights along the boardwalk.
  • A spline to add poplar’s adjacent to the driveway.
  • Finally, a spline to be used with RailClone Lite to create the boardwalk in the foreground.


Creating grass from presets

Let’s get started by adding grass using a preset from the library. You can load items from the library before or after you create a Forest Pack object. In this example, we’ll pick a library preset first.
  1. Go to the iToo Software Category in the Create Panel and select Forest Pro or Forest Lite.
  2. Click on the Library button to open the Library Browser. The lite version has two grass presets included: For simple grass you can use the Lawns > Common Grass preset, or for a lawn containing more variety including flowers and weeds you can use the Layered Lawns > Unkempt Lawns OIO preset. Select whichever you prefer, and then click import selected. In a preset most of the necessary settings are preconfigured, all you need to do is add the areas.
  3. To scatter the selected preset on a single surface or a spline, now all you need to do it pick it from the scene. A pop up may appear asking if you want to limit the scatter to the camera’s visibility and use Points-cloud display mode. Click Yes and that’s it! Your lawn is done.
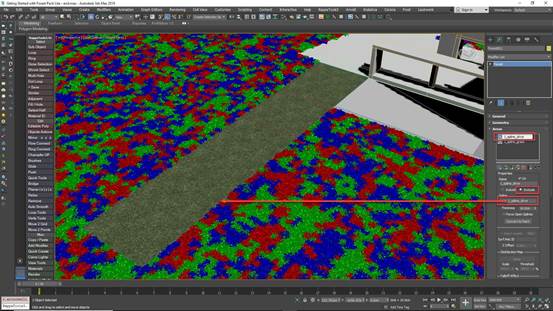
  4. If you want to add more areas, then switch to the Modify panel and go to the Areas rollout. Click on the button to Add a New Spline Area and then pick a spline from the scene. Forest Lite can use up to 4 areas, while the Pro version has no limits.
  5. You can also use areas to remove scattered items. In this example, we want to remove items from the drive. To do this, click the button to add another Spline Area and pick the drive spline from the scene. In the Areas rollout, change the mode to Exclude. Items will now be removed from that area. 

step5

© Copyright 2000-2022  COGITO SOFTWARE CO.,LTD. All rights reserved. 京ICP备09015132号-52