How to create such fading curved surface? Can you provide several clues? Please explain your idea.
It looks like this is a very typical question, how to deal with a smooth surface between two or three faces, should not be complicated for the product professional users, because this is a typical supplement, I provide a simple
Idea:
The initial curved surface
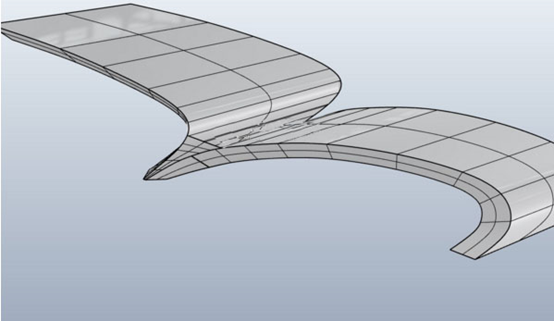
Final Effect
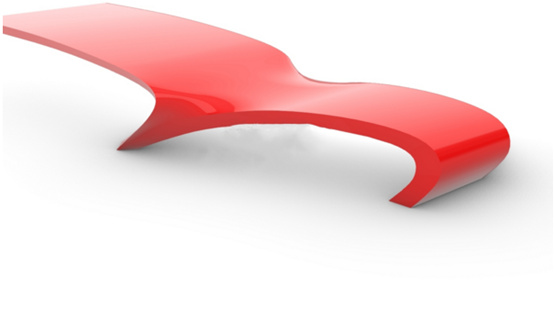
The original model of the title can be downloaded from the link above. I'll take a screenshot as above and start to enter the theme. Welcome to download the model and follow me. Please pay attention to the Rhino history function.
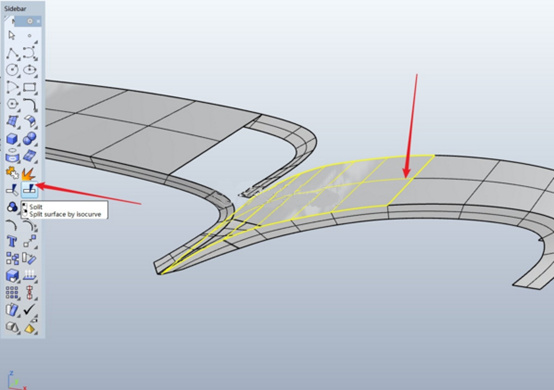
1. Use the Split command to split the surface on the left side of the image with the structure line and delete the yellow selected part

2. Splits the right surface in the same way and removes the yellow selected portion
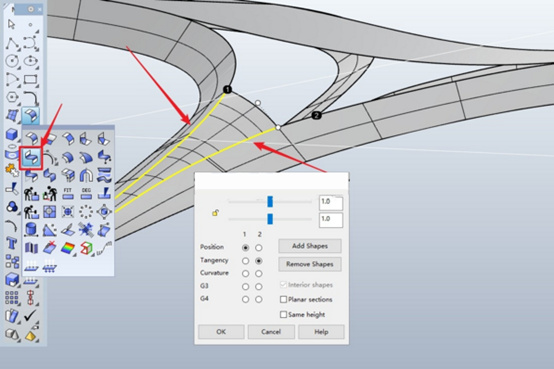
3. Use the BlendSrf command to create a smooth surface between the left and right surfaces. The settings can be referenced as follows
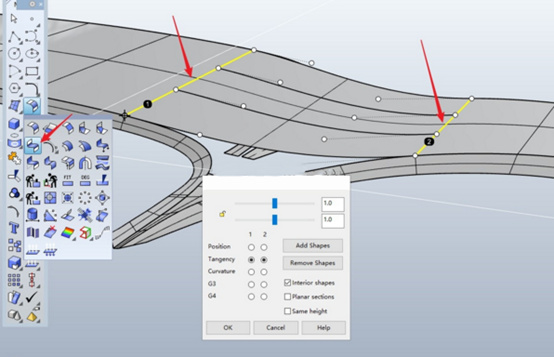
4. Continue to use the BlendSrf command to create a smooth surface in the lower half of the left and right sections. Note the location of the 1 and 2 sides. Refer to the approximate location where I can play, and note that the right side 2 is selected to be tangent continuous.
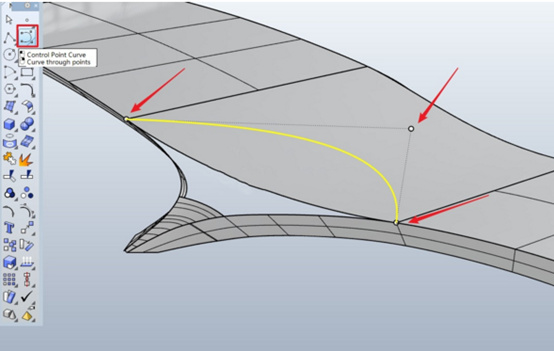
5. Create a curve with the following three points with the Curve command:
Reminder: Pay special attention to the positions of the 1st and 3rd point. Please be sure to capture the endpoints by using object snaps.
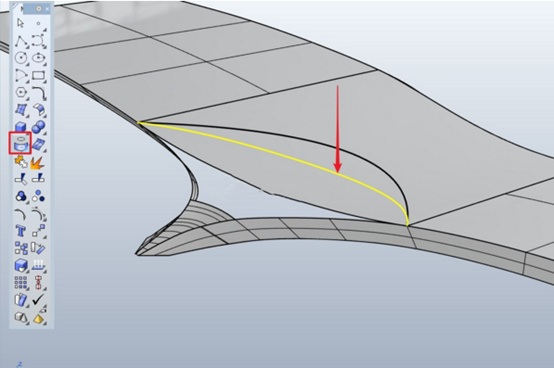
6. Project curve with Project command
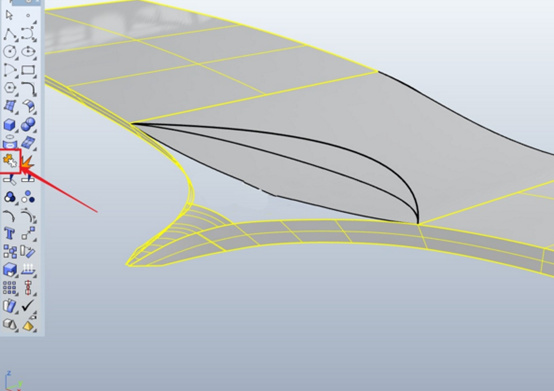
7. Combine all surfaces with the Join command (except the blended surface created in step 3)
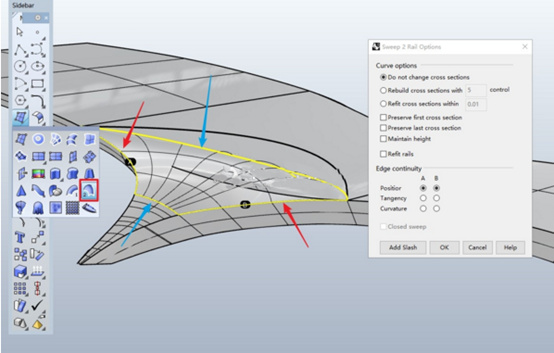
8. Create the surface with Sweep2, the path is the edge of the surface indicated by the red arrow, and the surface edge and projection curve selected by the blue arrow in the section.
9. Connect the surface created by the previous step and the adjacent surface with the MatchSrf command.
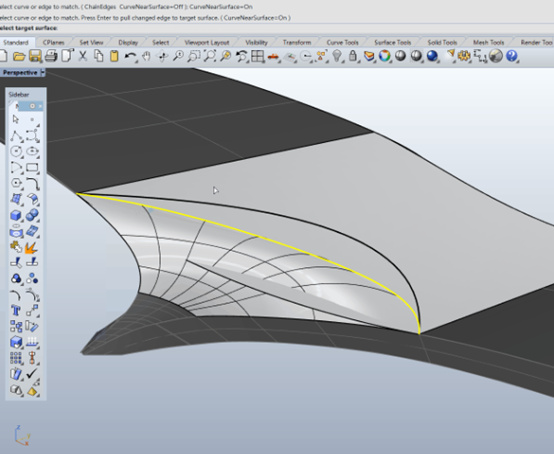
10. Open the control point of the curve established in step 5, coordinate the record construction history function, adjust the position of the middle control point, in order to achieve the purpose of adjusting the shape of step 8.
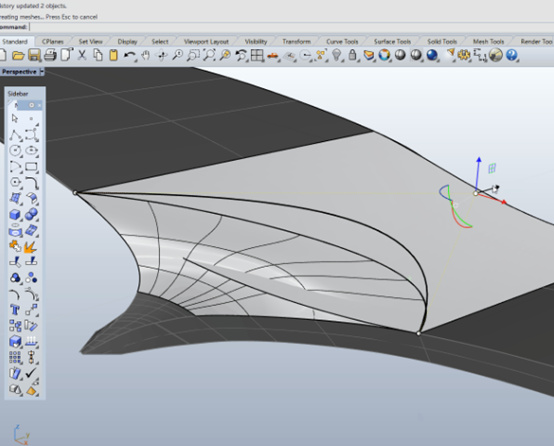
11. Select the projection curve with the Split command to create the surface, and delete the arrow selected surface
12. MatchSurface can be referenced as follows
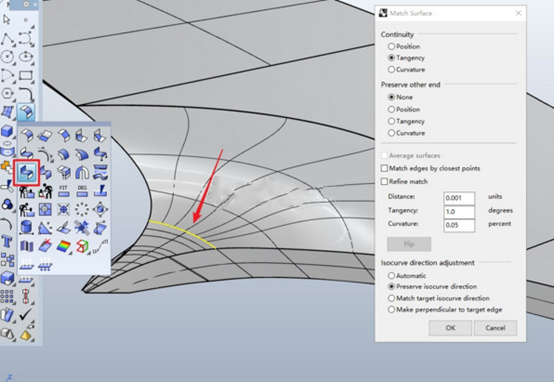
13 handle the other side in same way
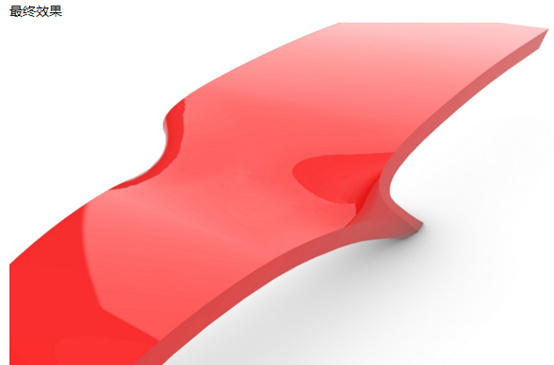
Final Effect
© Copyright 2000-2025 COGITO SOFTWARE CO.,LTD. All rights reserved. 京ICP备09015132号-52