We are delighted to welcome back Enscape user Melos Azemi to the blog with more great tips to help improve your visualizations.
Melos provided us with 4 Mistakes to Avoid When Getting Started With Enscape in his last post, and now he is sharing some tips on how to create realistic renderings.
Creating great-looking renders is possible in an instant with Enscape’s advanced real-time rendering engine, but if you want to take the realism of your renders one step further, take a look at these handy rendering tips from Melos.
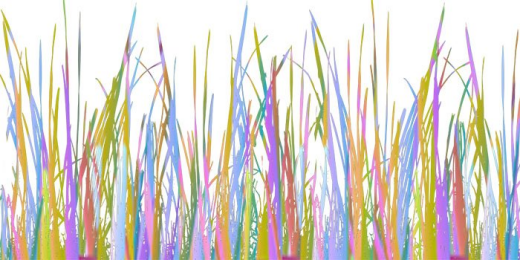
In some cases, the default Enscape grass might not look right in your scene. I usually run into this issue where the default grass doesn’t look the way I want it to, but thanks to a thread in the Enscape community Forum, I have learned how to improve the quality of the grass in my renders.
The first step to creating realistic-looking grass is to get this image, which we will use as a replacement for the default grass distribution.

To replace the default grass, go to:
Disk C: > Users > Local > Programs > Enscape > Renderer > System > Data > Textures > Enscape > Common
Even though there are a lot of folders that you have to open, this is nothing complicated. All you need to do after you’re at the final file is to take the original grass texture, maybe save it somewhere you won’t forget in case you want to put it back in Enscape, and then replace it with the new grass texture you have downloaded.
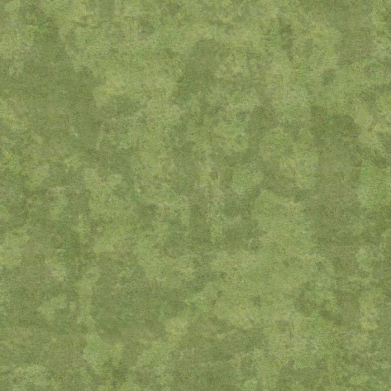
If you want to further improve your grass, I really like this texture which I also found in the same article. It adds different shades of green, which is actually what grass is like in real life. Credit to Forum user Herbo for sharing this with the community!

Having a good material configuration throughout the scene is crucial to achieving realistic results. If the new Enscape Material Library (available with Enscape 3.1 and above) doesn’t fulfill all your material needs, you can look to use other PBR materials from external resources.
PBR stands for Physically Based Rendering, and it basically means that PBR materials are based in the real world, and they’re very realistic. You can download PBR materials from many sources online (a few are mentioned in this free resources article), but the key is to know how to use them.
So once you choose a material that you like, you will see a few maps that pop up for you to download, and each one of them has its own purpose. Most of the time for Enscape, you won’t need to use all of them. I usually download the diffuse map, roughness map, displacement map, and bump map. Once you download them, you can easily apply these to your renders in Enscape.
To do so, create a new material in your native modeling software and then load up the diffuse map first. After that, we apply the flat diffuse texture. We would want to go to the Enscape Material Editor tab and then import each map into their sections.
The material looks much more realistic than placing a flat material, and it saves time from configuring all the parameters of the materials yourself.
While the default light distribution in Enscape is great, using IES profiles can give a real boost to the realism of your renders.
If you haven’t heard of an IES until now, it’s basically a file that provides more photorealistic lighting distribution in rendered images than the default light distribution in most rendering engines.
IES profiles are usually based on real-world light distribution, and some of them are created based on manufacturers of certain light bulbs or other lighting objects. You can download plenty of IES profiles for free online, and you can upload them pretty easily into Enscape. You can also sort them by the light type that you want to place them on.
To apply an IES profile into your scene you will need to go to the objects tab, check the “load IES profile” section, and load up the IES you want. Right after you load up the IES file, you can see that the default lighting distribution that Enscape offers is replaced with an IES profile that I believe, if used correctly, can bring better results to your scene.
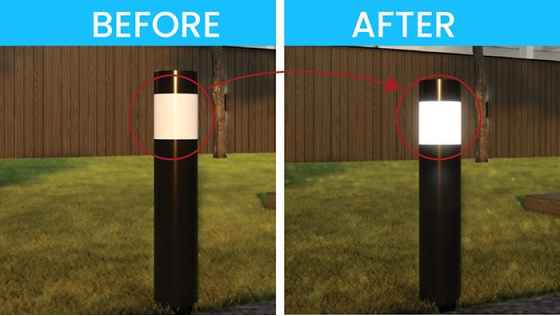
Most of your scenes probably have artificial light sources. And what some beginners in Enscape or even rendering, in general, don’t know is that putting a light source close to a light object doesn’t actually light up the light object itself. And there is one simple way to fix this issue.
If you want to light up the exterior light you can select the material with the eyedropper tool (in SketchUp) and change the material option into self-illuminated in the Enscape Material Editor, and that way, it actually looks like it has some light coming from inside of the object.

Through the slider, you can make the light stronger or softer depending on your scene, and you can change the color that it emits as well.
This can also be applied to other types of lights, like pendant lights, recessed lighting, lamps, etc.
Another way in which you can make your renders more realistic is through HDRI images (in Enscape, referred to as Skybox as a background). HDRIs help us in two different ways when we’re rendering; the first one is to give us a background for our horizon, and the second is to give us a realistic light source from real-life scenarios.
There are a few ready-to-use HDRIs within Enscape. But if you’ve already downloaded another HDRI, to apply it, go to the Enscape Visual Settings, click on the sky tab, change the option to Skybox and then load it up from the location you downloaded the HDRI to.
Most of the HDRIs will make the sky and the lighting look very different than the default Enscape sky. You can play around with plenty of HDRI images and see the difference between them, after which you can choose the one you like the most.
A lot of people overlook this since they use HDRIs just as a filler image for the background. But in fact, the materials reflect a lot of what the HDRI image contains and can provide more realistic lighting throughout the whole render.
As 3D visualizers, we have to pay close attention to where imperfections appear in our day-to-day lives in order to apply them correctly in our renders. In the real world, there’s no such thing as clean-cut 90-degree corners or even regular smooth surfaces, and we should strive for that look in our renders as well.
To be able to apply imperfections, we first need to find a source of imperfection maps. There are a few free sources online that you can use where you can find pretty good surface imperfections.
So usually a few types of imperfections that I would recommend are dust, scratches, and fingerprints. After you have downloaded a few textures for each type of these imperfections, you can go ahead with the next step and see how to apply them to your renders.
For me, there are two different ways to apply these imperfections, and depending on the scenario, I would choose either one of them.
The first and quickest one is when I apply the surface imperfection to a material through the Material Editor, and add the imperfections map in the roughness section. This can work quite well in some cases, but sometimes you would want to only apply imperfections to a certain area of the surface.
I begin by creating a new surface within the one that exists with the freehand line tool, that way it is as irregular as possible, and in the new surface that we created I apply a copy of the material that already exists.
After I have created a copy of it, I would go into the Material Editor and apply the imperfections map in the roughness section. Make sure that you match the specular parameter through the slider, so the surfaces don’t have too much of a difference between each other when they reflect, and after that, you’re pretty much done.
© Copyright 2000-2026 COGITO SOFTWARE CO.,LTD. All rights reserved. 京ICP备09015132号-52