
Operators - Manipulate Segments and create patterns
We could stop here, but let’s take our exploration of RailClone a little bit further and look at the third and final basic principle of using RailClone called Operators. As we’ve seen, operators are akin to Max’s Modifiers, in that they allow you to in some way process geometry. We’ve already used two of these: a Compose operator to combine segments, and the Mirror operator. Let’s take a quick look at several more of the most useful operators. To see how these work, check out the annotated RailClone object in the tutorial downloads called RC - Completed Style.
Material operator
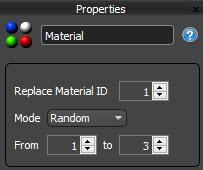
The Material operator allows you to choose a Material ID and replaces it with a new value. You can either choose to randomise between a range of IDs or loop through the IDs in a sequence to create repeating patterns.
Randomise operator
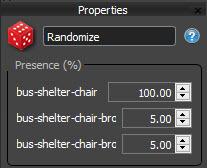
To demonstrate the next operator we’ll add a couple more Segment nodes and pick some broken seats from the scene. With that done we can take a look at the Randomise operator which allows you to pick a random Segment. Each segment has a presence value that determines the probability of it being selected. These values are normalised so there is no need to ensure they add up to 100%.
Transform operator
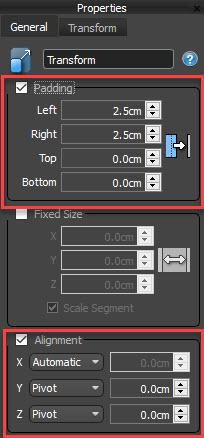
You’ll notice an issue with those last seats, they’re not in the correct position because I forgot to set the pivot points. This is a good excuse to demonstrate the Transform operator which allows you to make global changes to padding, alignment, and transform settings for segments that flow through it. It’s really handy for making big bulk changes without having to enter the same settings for loads of segment nodes.
Selector operator
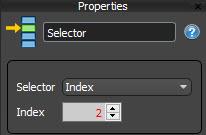
Let’s add an alternative Start segment to the graph and pick a piece with an advert from the scene. To make a kind of switch you use the Selector operator. Add one to the graph and drag it’s output to the bus-shelter-start node’s output. This will swap the wires. You can then wire bus-shelter-start-1 to the Selector operators first input, and bus-shelter-start-2 to the second. This gives you the ability to toggle between these two options using the index parameter in the Selector node’s properties. By copy-pasting the Selector node and wiring the new version to the mirror operator I have the ability to decide which piece I want to use separately for the start and the end of the shelter.
UVW XForm operator

If you take a look at the advert on the end of a shelter you’ll spot a problem, because we mirrored the geometry, the poster's text is reversed. You can fix this using the UVW XForm operator which allows you to manipulate the mapping coordinates already applied to a segment. There are two modes available: Fixed mode which is pretty self-explanatory, or Random mode which shuffles within a range the tiling, offset and rotation of UVW coordinate to create unlimited variation. In this case we just want to fix this texture problem by setting the U Tile setting to -1. (I should mention that to get this generator to work with Corona you will need to disable the instancing engine from the Display rollout).
Sequence operator
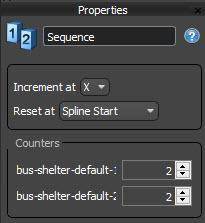
OK - But what if instead of a switch I want to create a pattern? For that, you turn to the Sequence operator. In this example we will create a pattern of glass panels with maps and glass panels without. Wire a Sequence operator to the Default input and wire the original Default segment to the first input. Wire the Segment called bus-shelter-default-2 to the second input. You will no have a repeating pattern. Of course, you can change that order simply by using the arrows on the Sequence operators. You can increase the count value of a particular input if you’d like it to display more than once.
Numeric nodes

That covers most of the regularly used parameters. One other thing I wanted to mention is the ability to add Numeric nodes to this graph which allow you to control properties directly from the Modify panel. For example, imagine that I want to be able to control the ends of the shelter without opening the graph. To do that you must expose the property by right-clicking on a node and picking Export Parameters. Select the parameters you’d like to export, in this case Index, and click OK. The node will now have a new input. If you create a new Numeric node and wire it to this property you can control this value without having the graph open. The numeric node has settings that allow you to control the type of number and set limits to constrain the range from which a value can be selected.
More or less any property can be exported and controlled from the modify panel in this way.
Bonus - Deformation
To wrap up this tutorial I just wanted to say a couple of words about deformation. At present this bus shelter is on a straight spline, but of course one of RailClone’s most powerful features is its ability to deform geometry to follow curved paths. Best of all, it’s as easy as just assigning the style to a curved spline!
There are also a couple of advanced modes you can use when the path isn’t planar on the Z axis that are worth a quick look. Imagine that this bus shelter is on the hilly streets of San Francisco, in that case, the default adaptive mode doesn’t look right. The shelter sticks our from the pavement at a strange angle and anyone trying to sit on these chairs will end up in a pile in the corner.
Each segment has 3 deformation modes that can be used. Adaptive is the default, but the second, called Vertical, is particularly appropriate for this example. It keeps the verticals upright while allowing it to skew the rest to follow the path.
When it comes to the chairs that won’t work either though. For the chairs you can use the 3rd options which disables the deformation completely and simple creates a stepped distribution.
Using the vertical/flat top and bottom settings it’s even possible to combine these two modes based on a distance from the base spline. We’ll cover these settings in more detail in a future tutorial.

Conclusion
In this tutorial we looked at the 3 basic principles of RailClone: Base Object, Rule Generators and Operators which corresponds to the 3 categories of nodes found in the style editor. Spread across these 3 categories there are in fact only 21 nodes in total to learn, and we went through the majority of those in this short tutorial! Don’t be deceived though, this handful of options belies the enormous power of RailClone to recreate nearly any object that features repeating geometry!
So now that you’ve been introduced to the basics, what are you waiting for? Go ahead and start creating, and if you have questions along the way, don’t hesitate to let us know on our forum, or simply share your progress.


© Copyright 2000-2026 COGITO SOFTWARE CO.,LTD. All rights reserved. 京ICP备09015132号-52