
Artlantis 6.5 workshop
Speed up your renderings with
Artlantis 6.5
?
Rendering parameters
The rendering parameters dialog is used to set the engine parameters.
Beginners should use the Ambiance and Settings popup menus; they set all the Global illumination and Sampling parameters according to the chosen value. Those settings can then be fine-tuned by advanced users.
In this workshop, we will go through all those settings to highlight their impact on quality and rendering time.


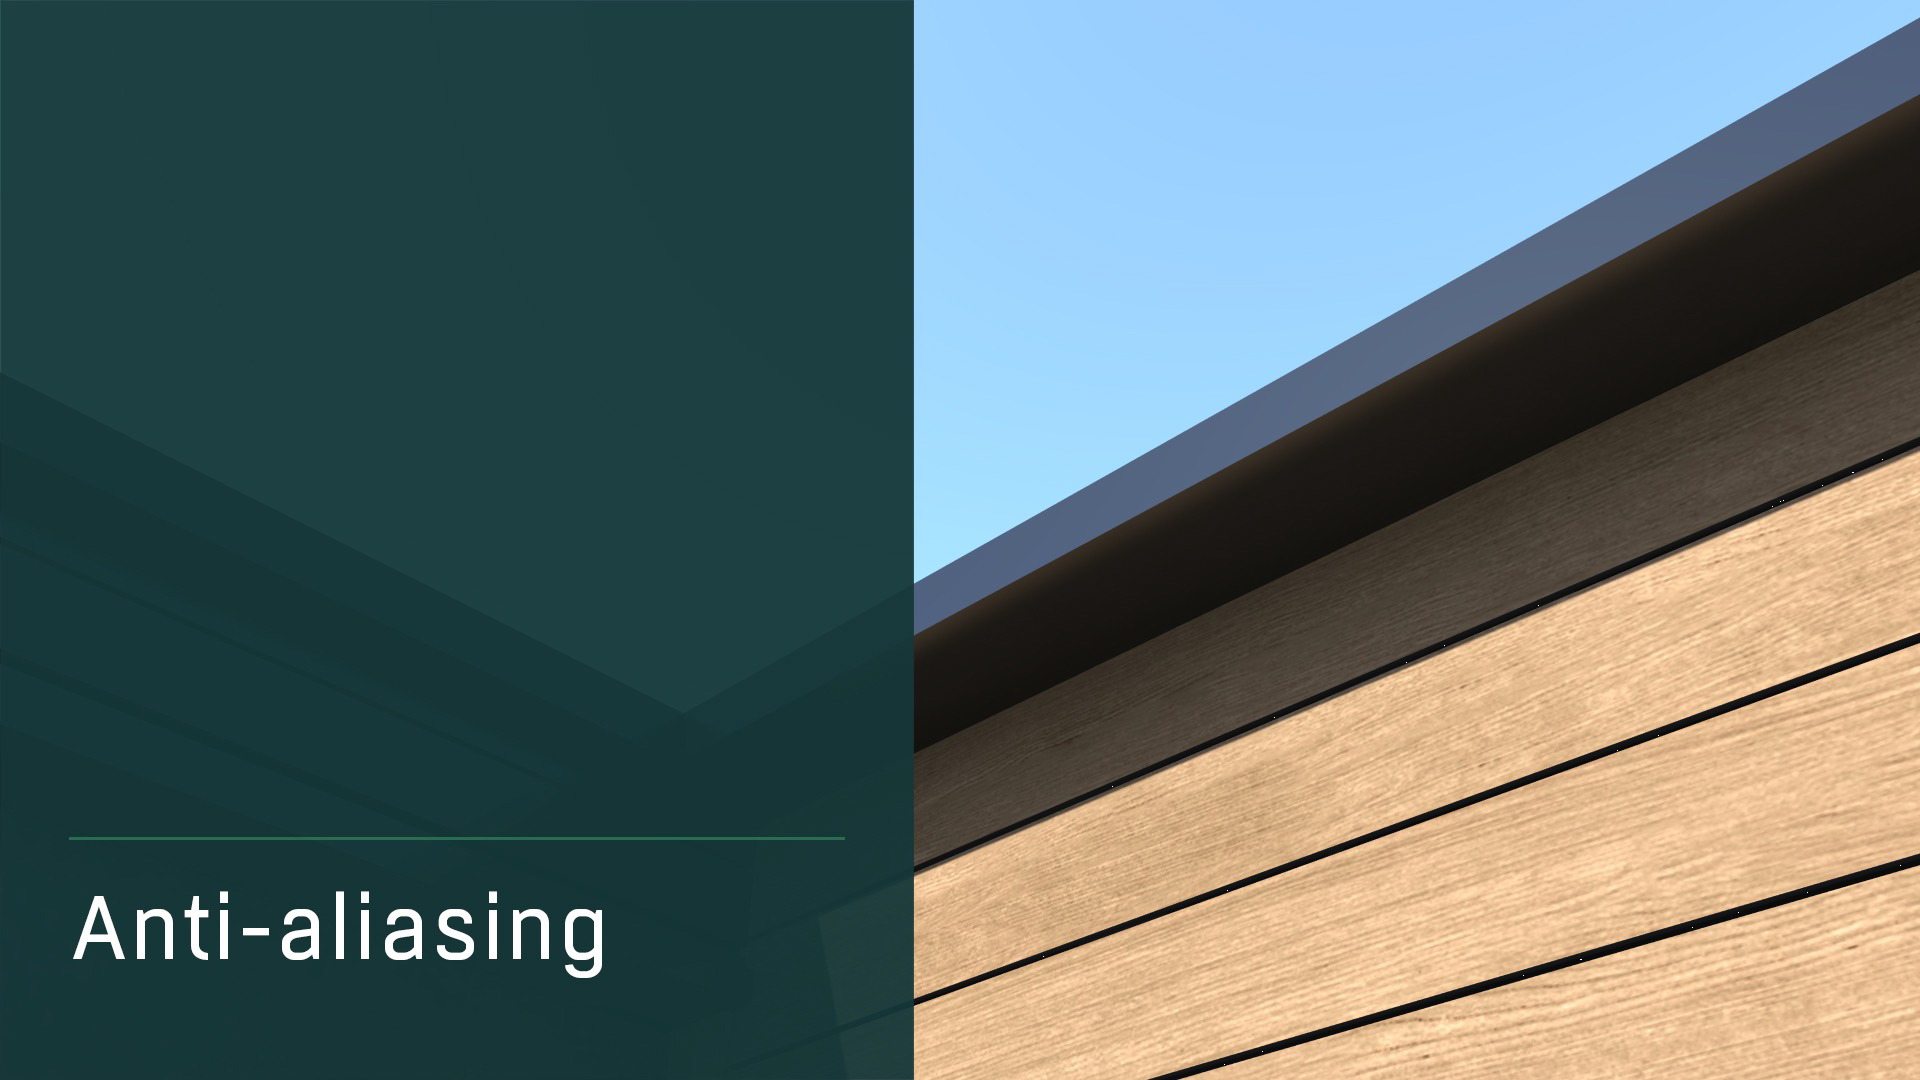
Anti-Aliasing
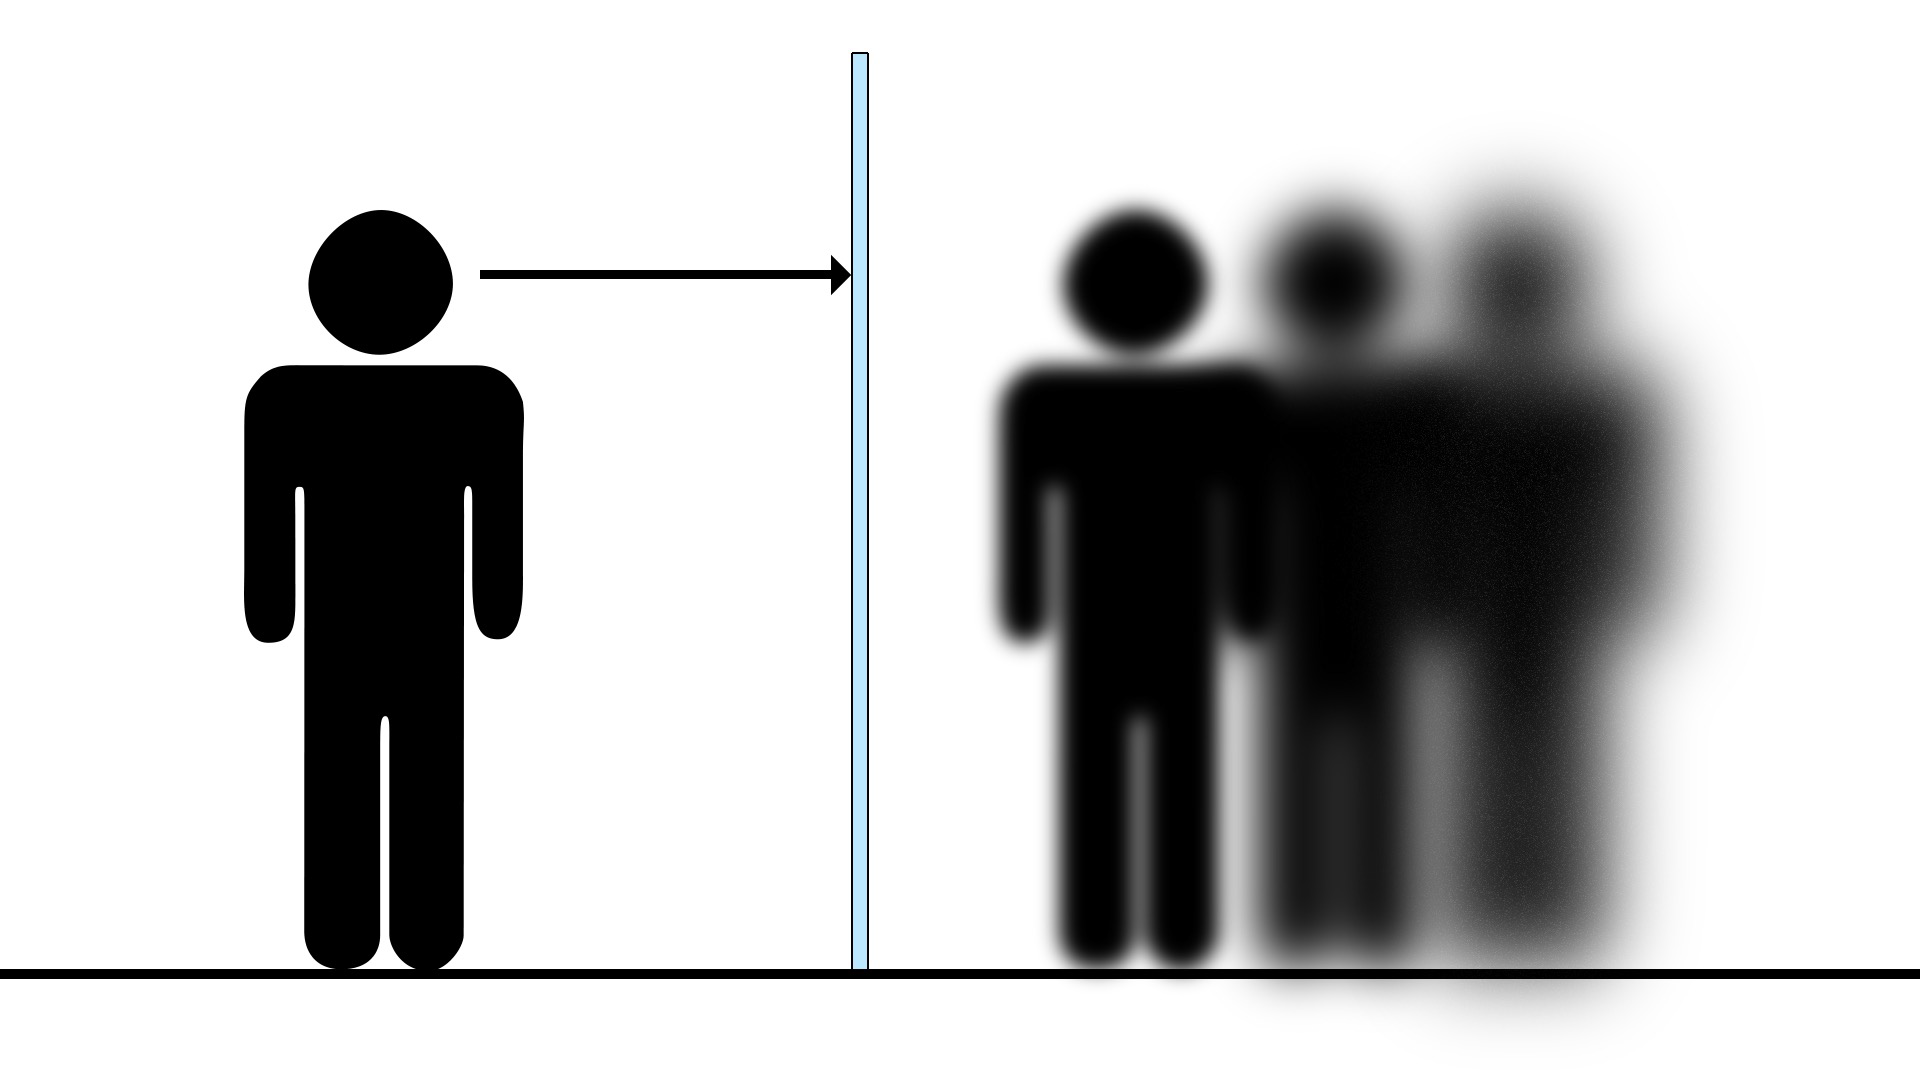
Anti-aliasing is a process allowing you to smooth the edges, like the ones in the following image:
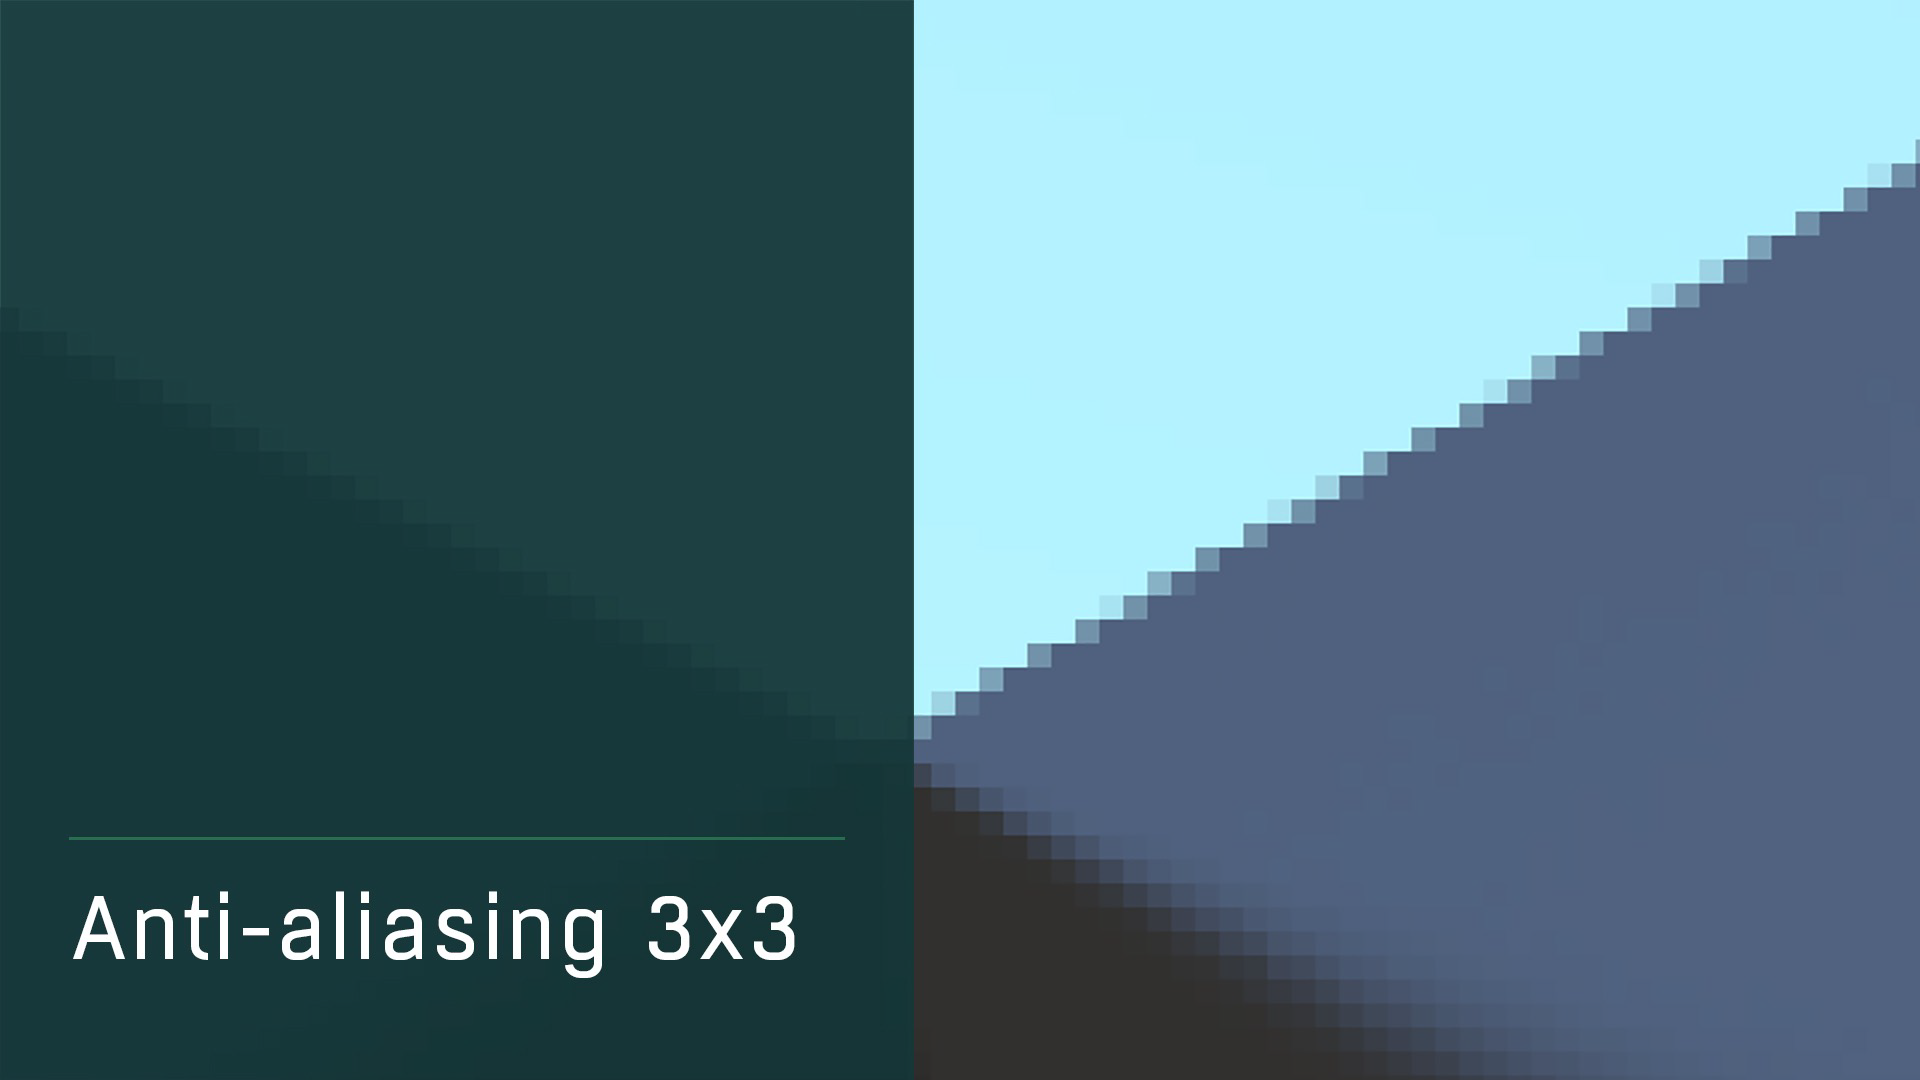
When activating anti-aliasing Fixed Rate (3×3), the engine analyzes 9 pixels around each pixel to see if it is dark or light and chooses an intermediate value to smooth the result.
When activating anti-aliasing Fixed Rate (4×4), the engine analyzes 16 pixels; the result is even smoother.
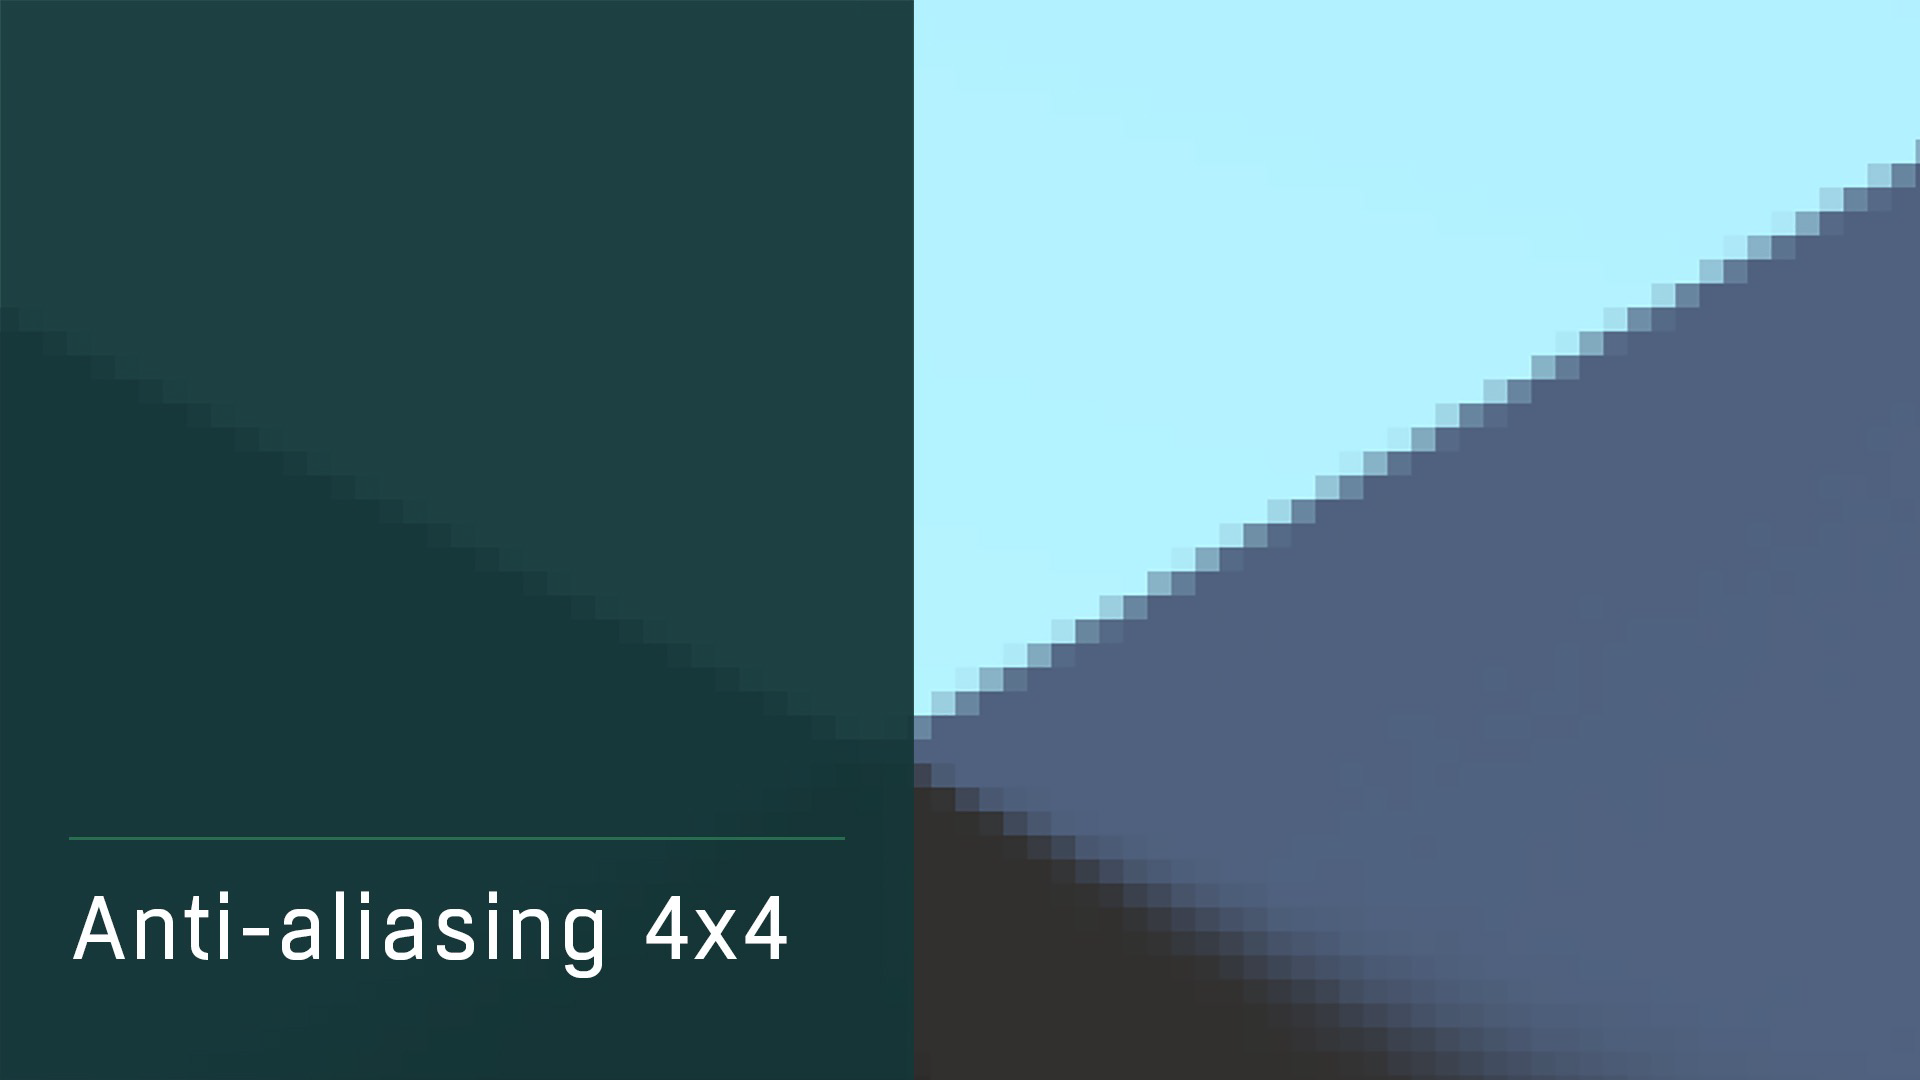
The rendering time in 4×4 is on average 10% to 30% slower than 3×3.
But the 3×3 setting is already very good, better than version 5 high-level setting. 3×3 is enough in 98% of the cases.
4×4 can be necessary in very special cases, like the very fine cable of a suspended light.
Tip: By default use anti-aliasing 3×3
Irradiance Cache
The new Artlantis engine uses an Irradiance Cache to calculate the scene’s global illumination.
Accuracy, Hemisphere and Interpolation parameters are used to set the scene’s global illumination. We will study the effect of each parameter; they can all be set to a value between 1 and 5.
Accuracy
The accuracy value determines the number of Irradiance Cache pass calculated by the engine. With each pass, the engine throws rays that impact the surfaces and are represented by clear squares in the rendering preview.
With each pass, the engine throws additional rays, emphasizing the details and angles of the geometry, which makes it possible to specify the light that arrives in each zone of the image:

We see that in flat areas, like the ceiling, the engine launches fewer rays, because it does not need more precision.
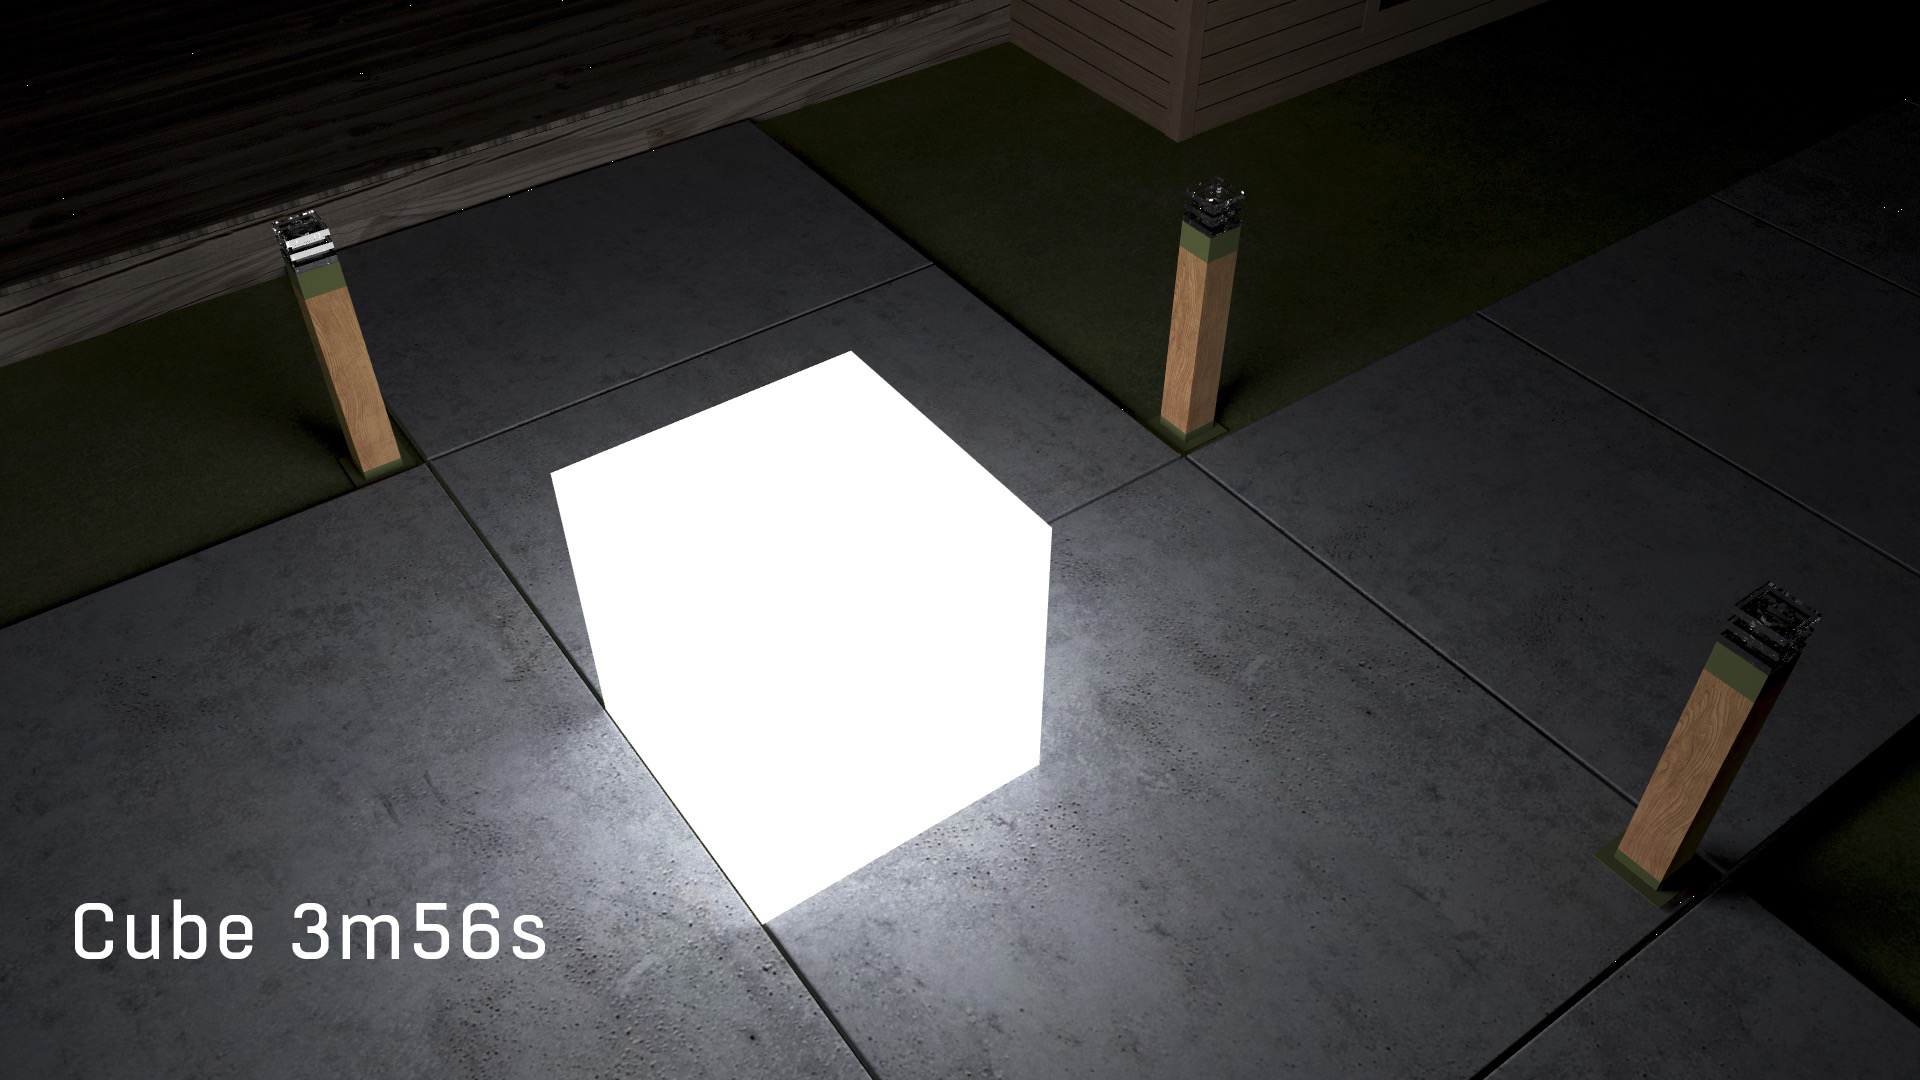
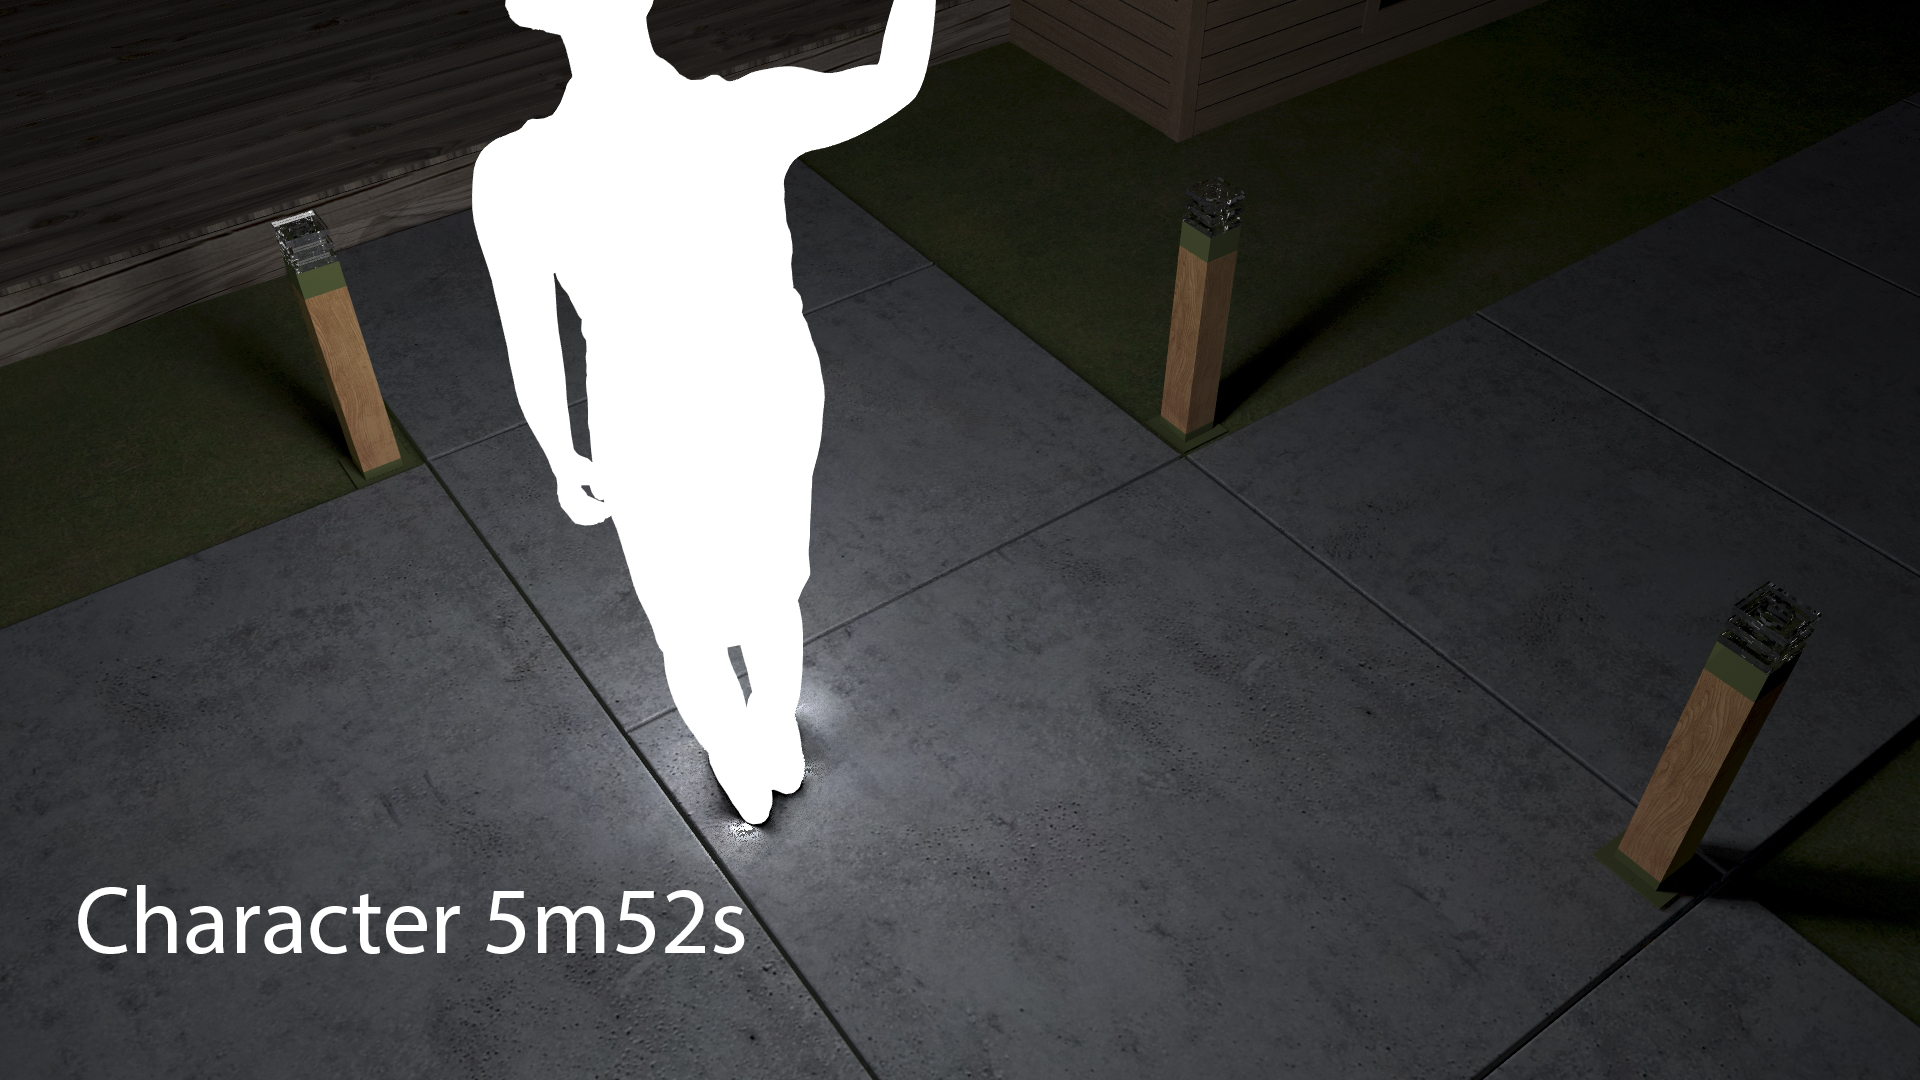
Image calculated with Accuracy set to 1:
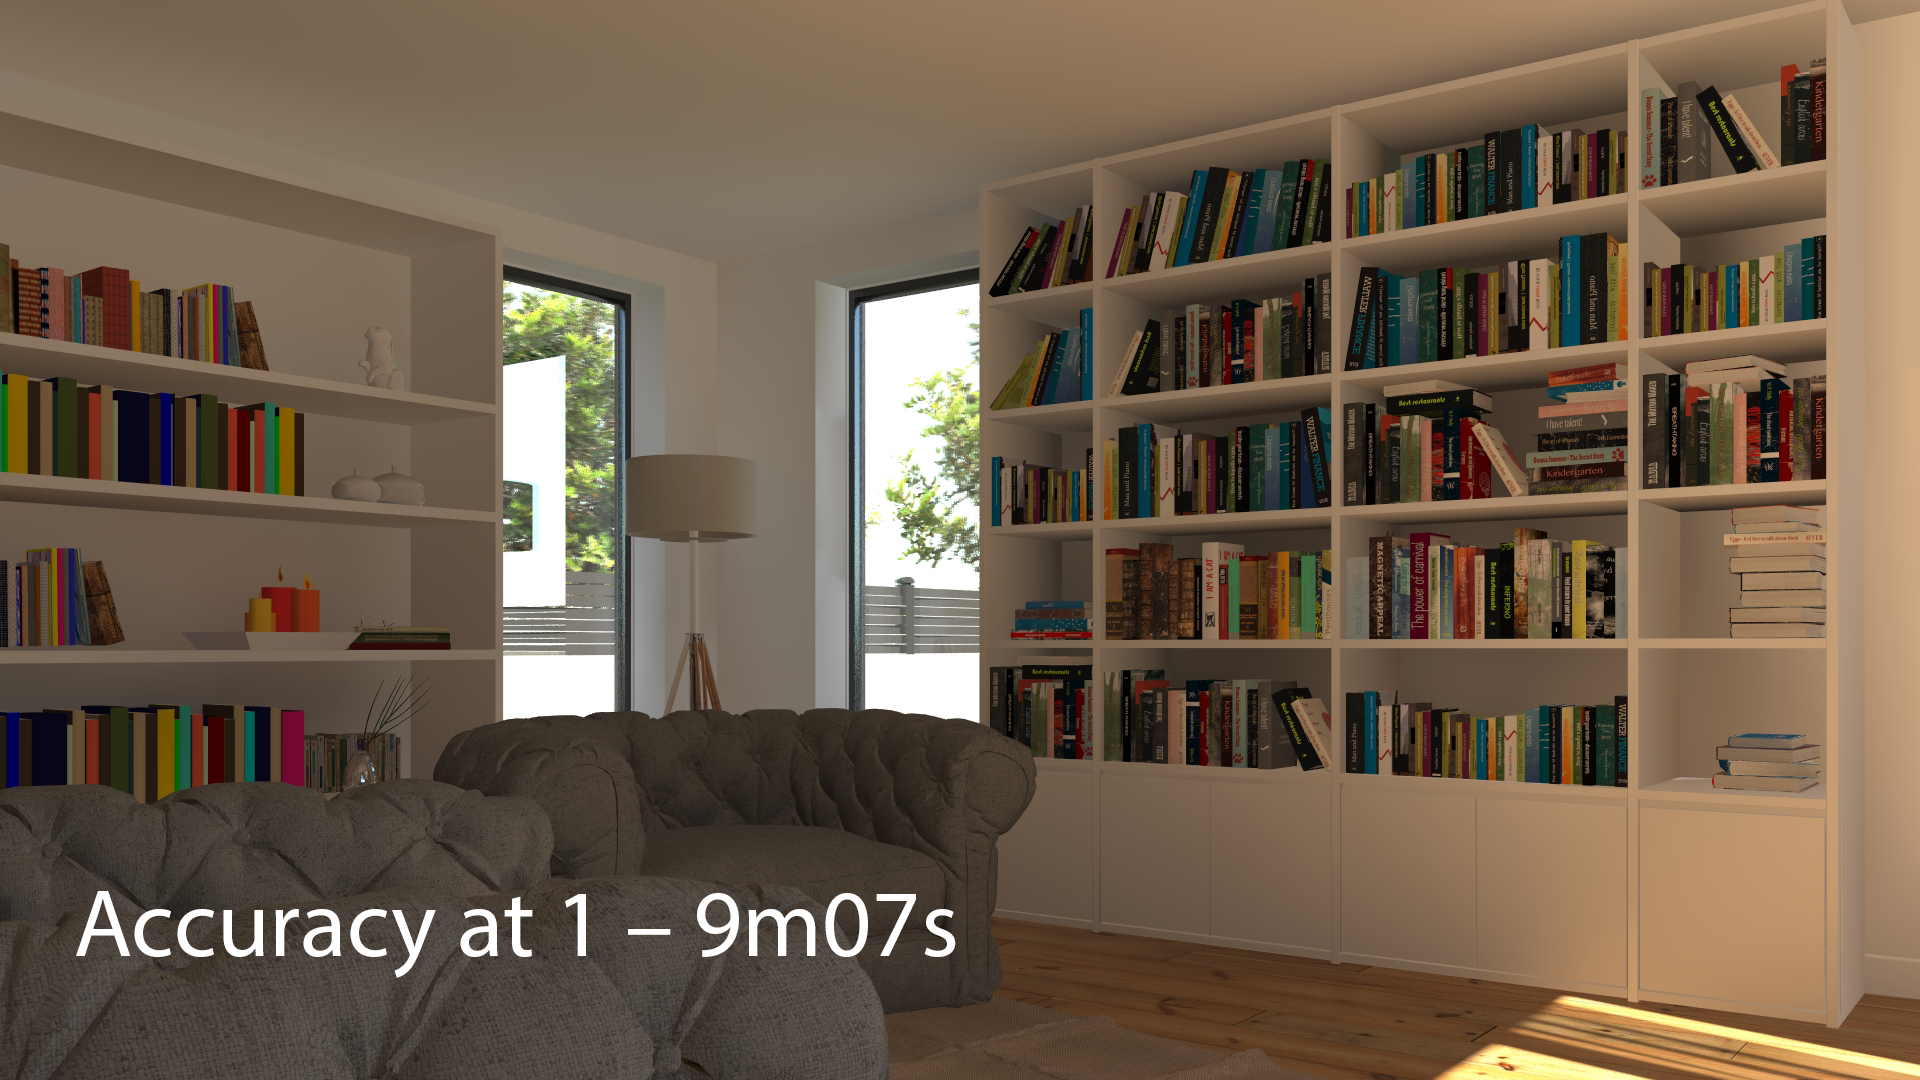
Image calculated with Accuracy set to 5:
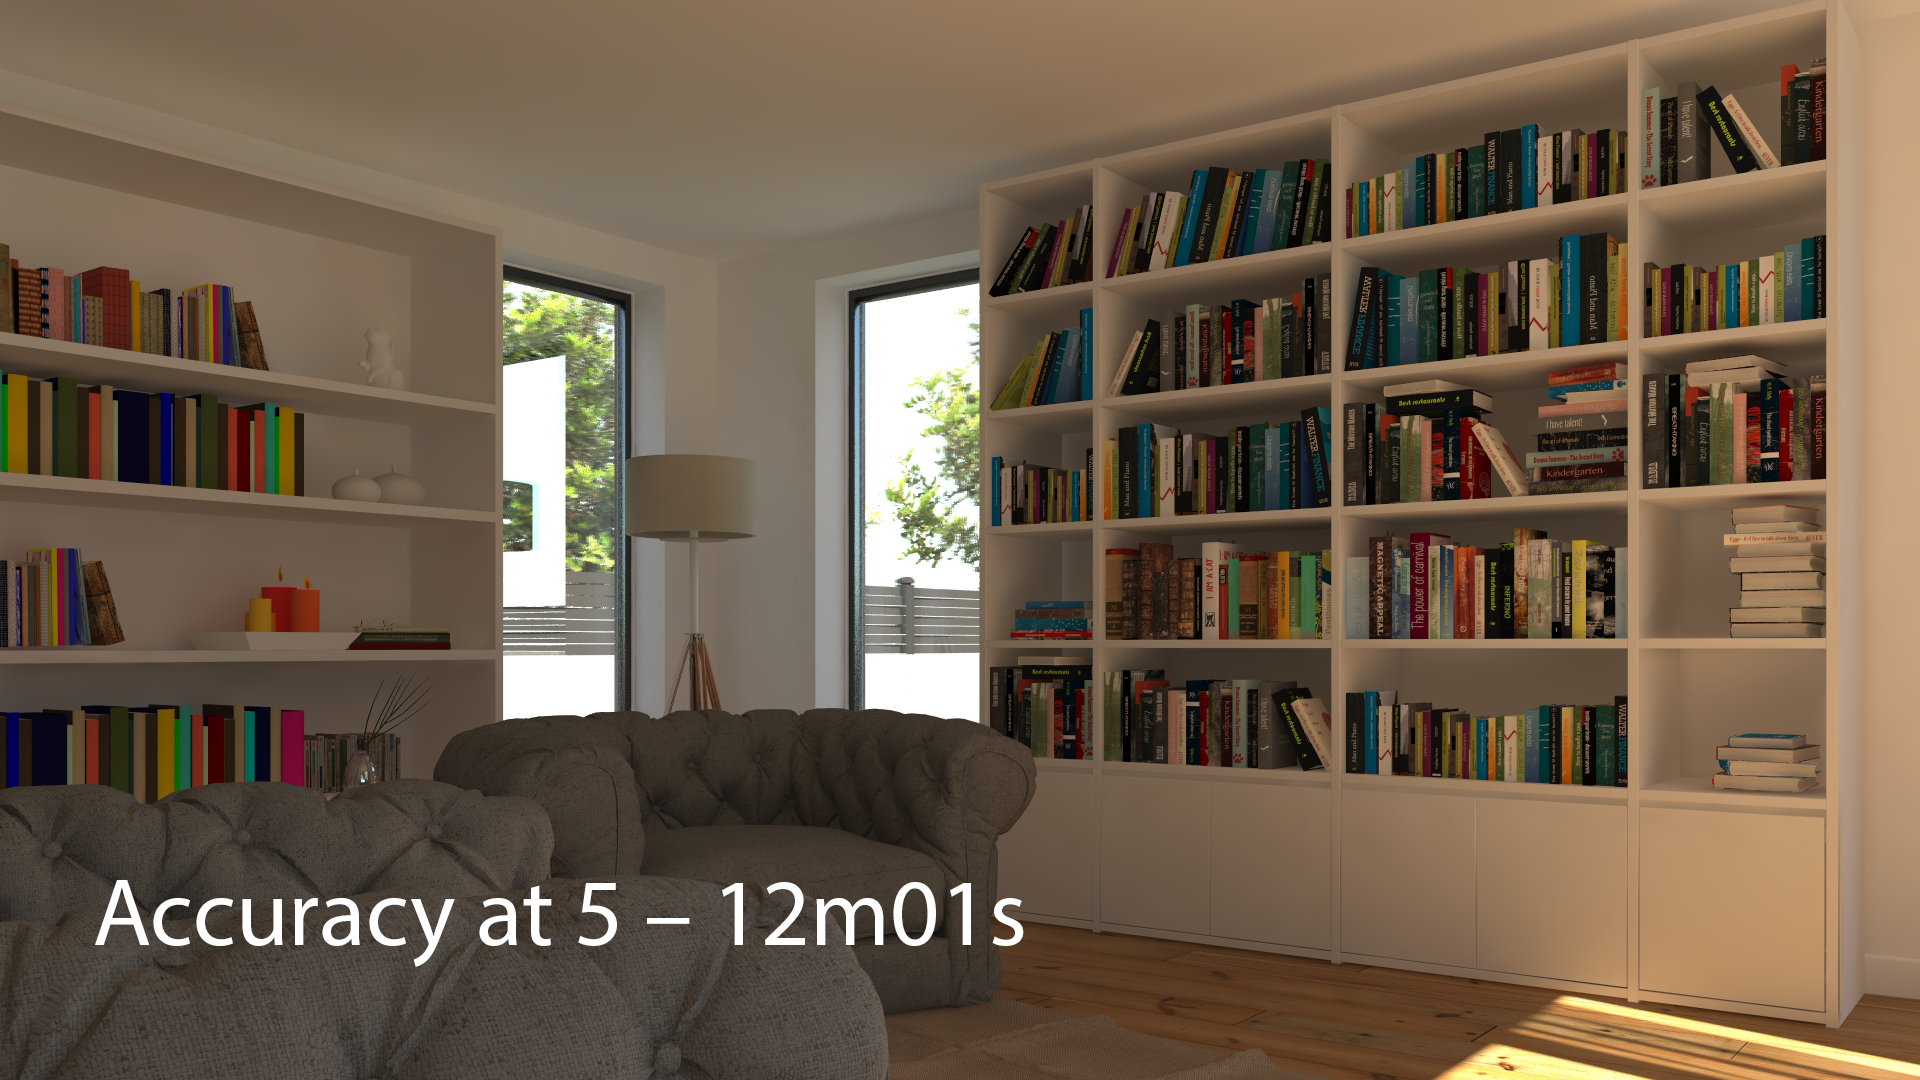
The difference between these two images is especially visible in the shadows inside the libraries and where there are small details of geometry as on the back of the chairs. The higher the accuracy, the greater the calculation time, but it increases especially if there are a lot of geometry details.
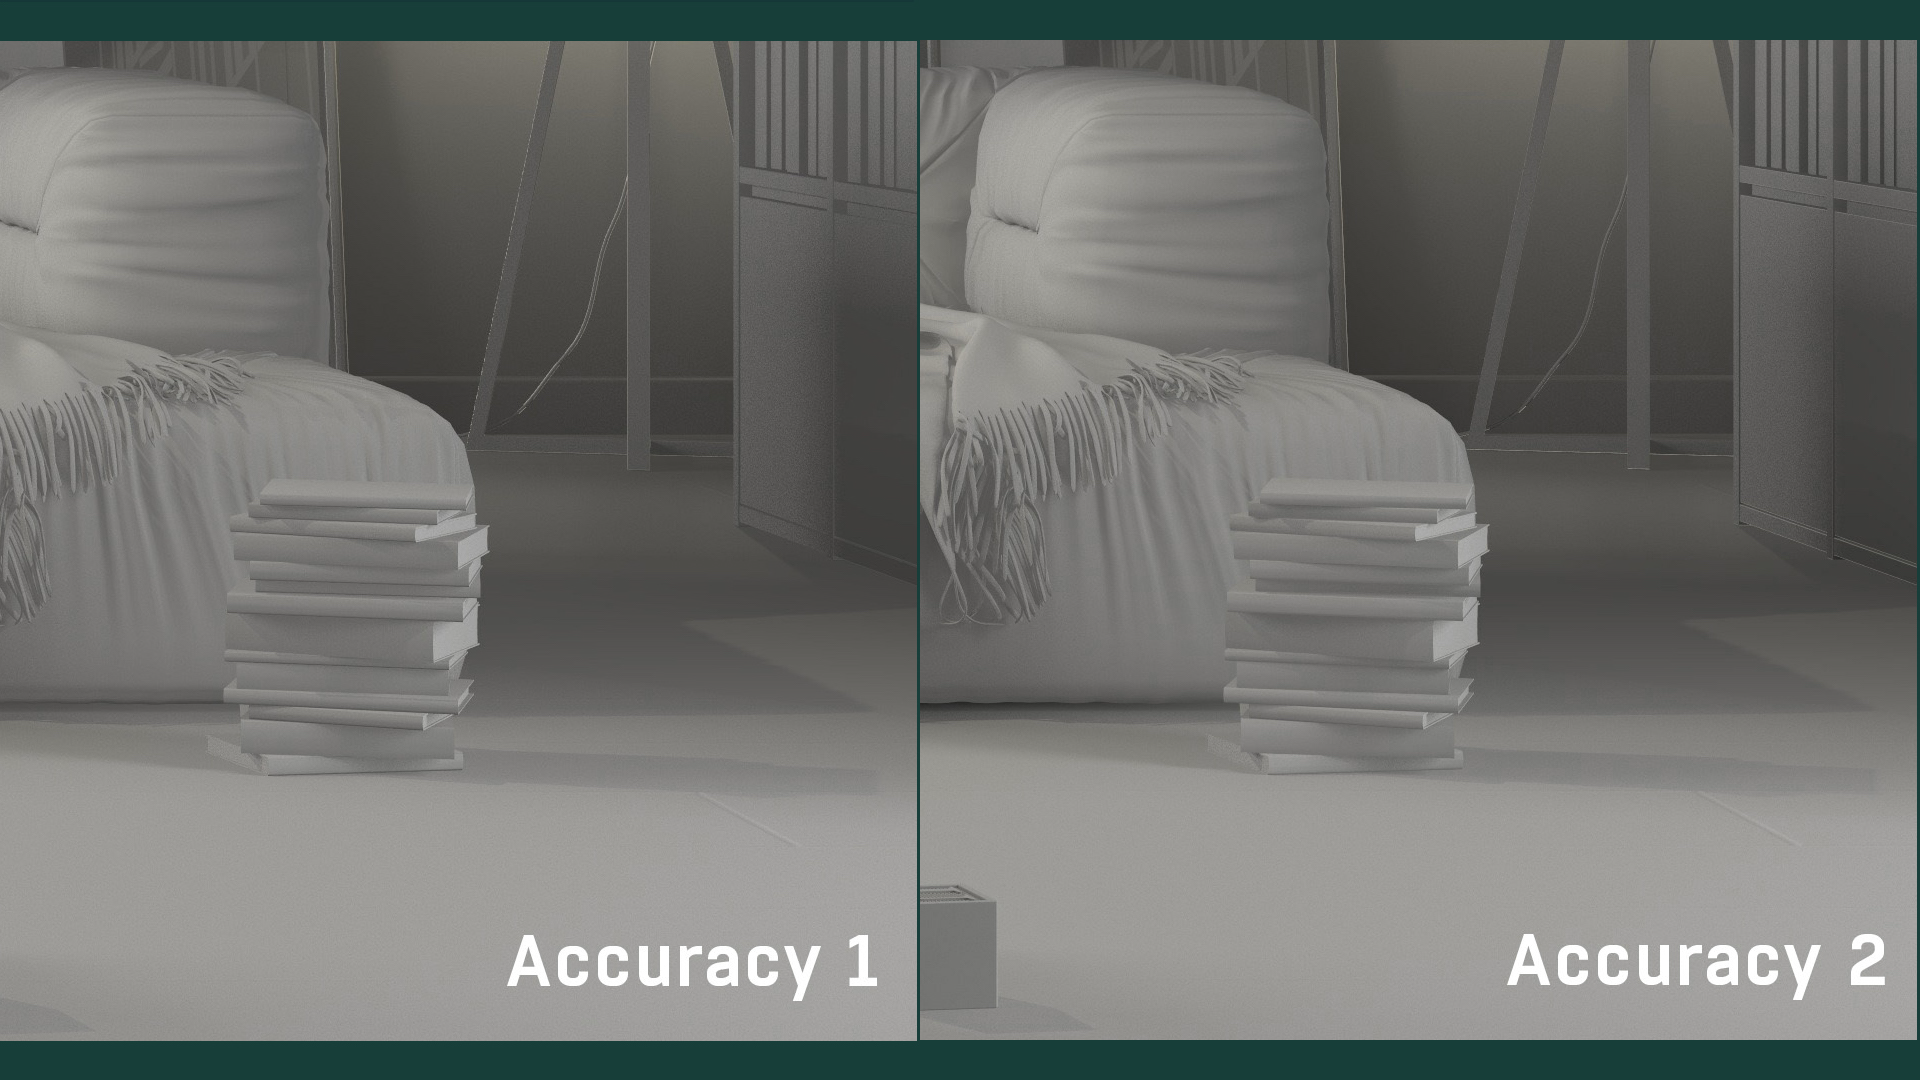
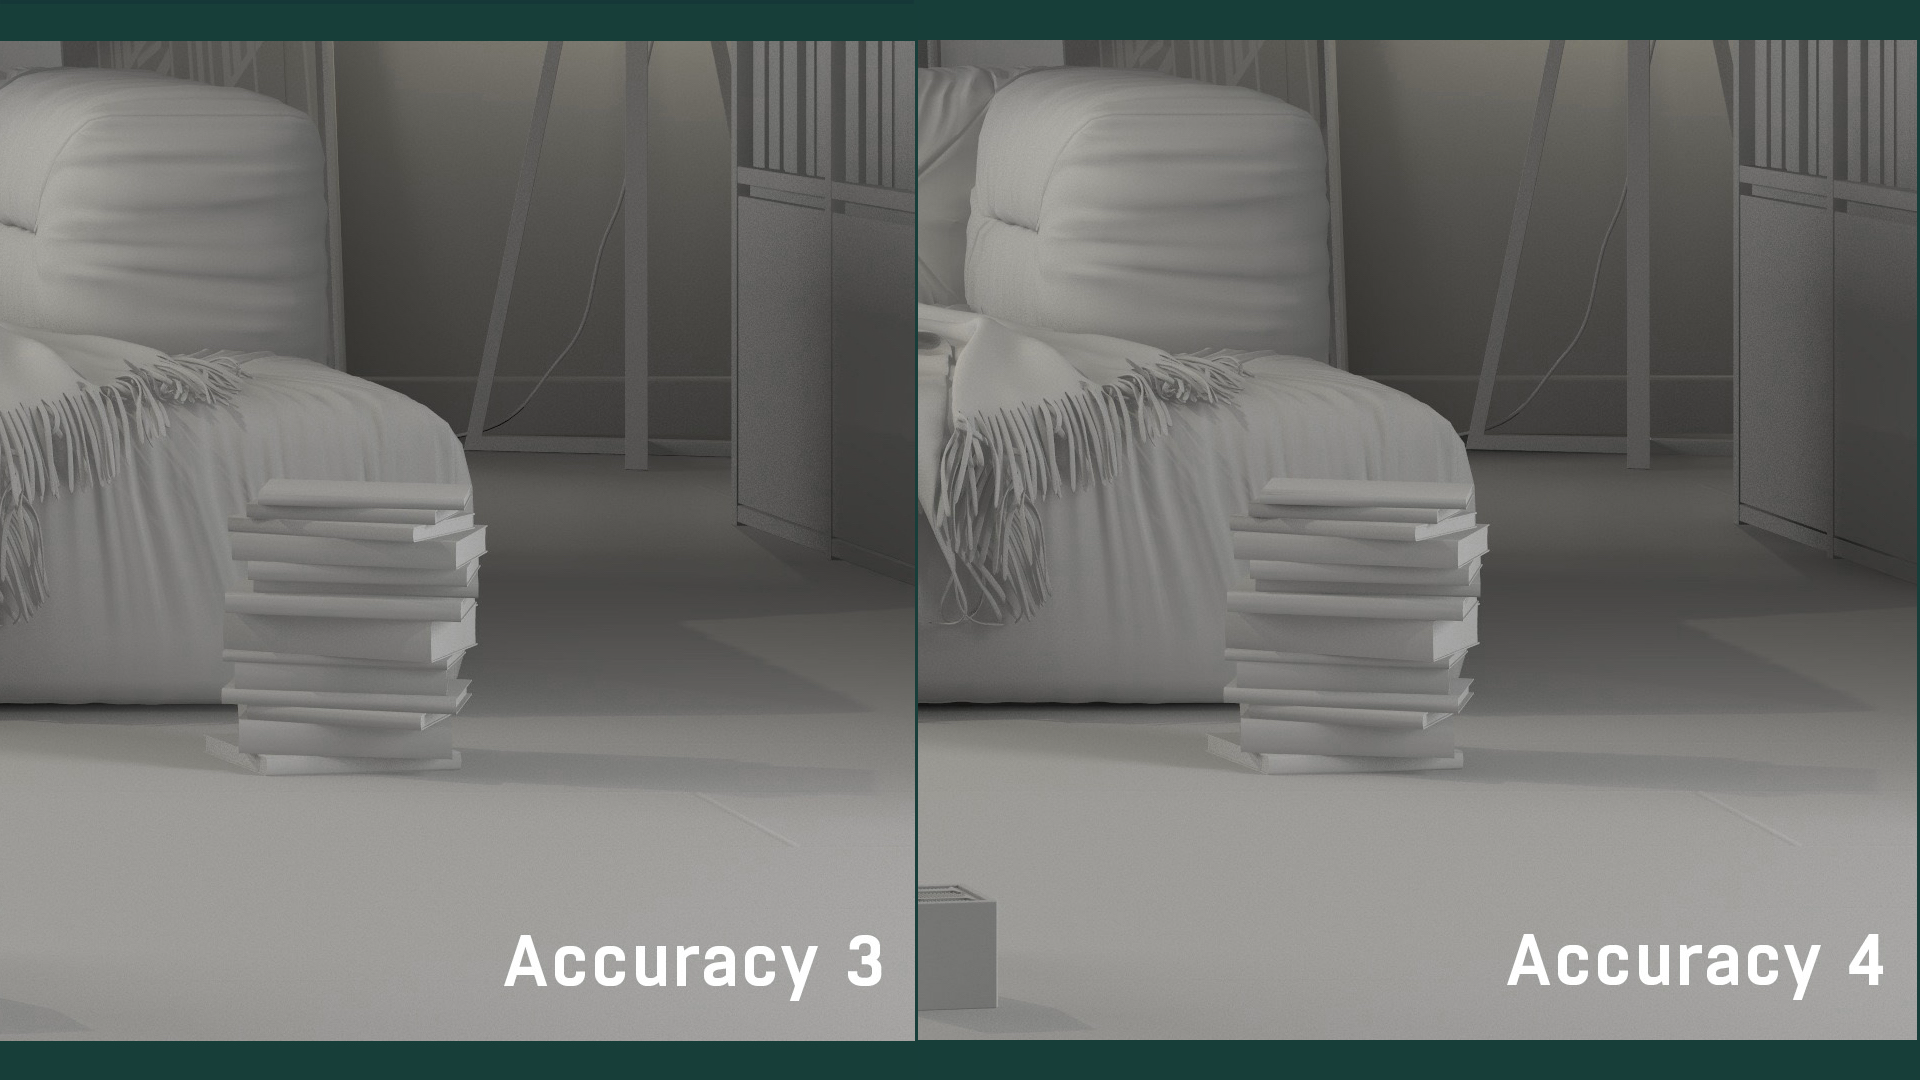
We will see, with a white model rendering, the rendering differences for each value of the precision. The more you increase the accuracy, the more precise and detailed shadows you will have. Look under the sofa, on the fabric of the sofa and the bottom of the cabinet on the right of the image.

Hemisphere
Increasing the value of the hemisphere helps to better distribute the points of impact. This also avoids energy discrepancies on a flat rendering.
Accuracy and hemisphere go hand in hand; if one increases the precision, it is necessary to increase the hemisphere.
Increasing the value of the hemisphere increases calculation time, but that’s not the most time-consuming.
Interpolation
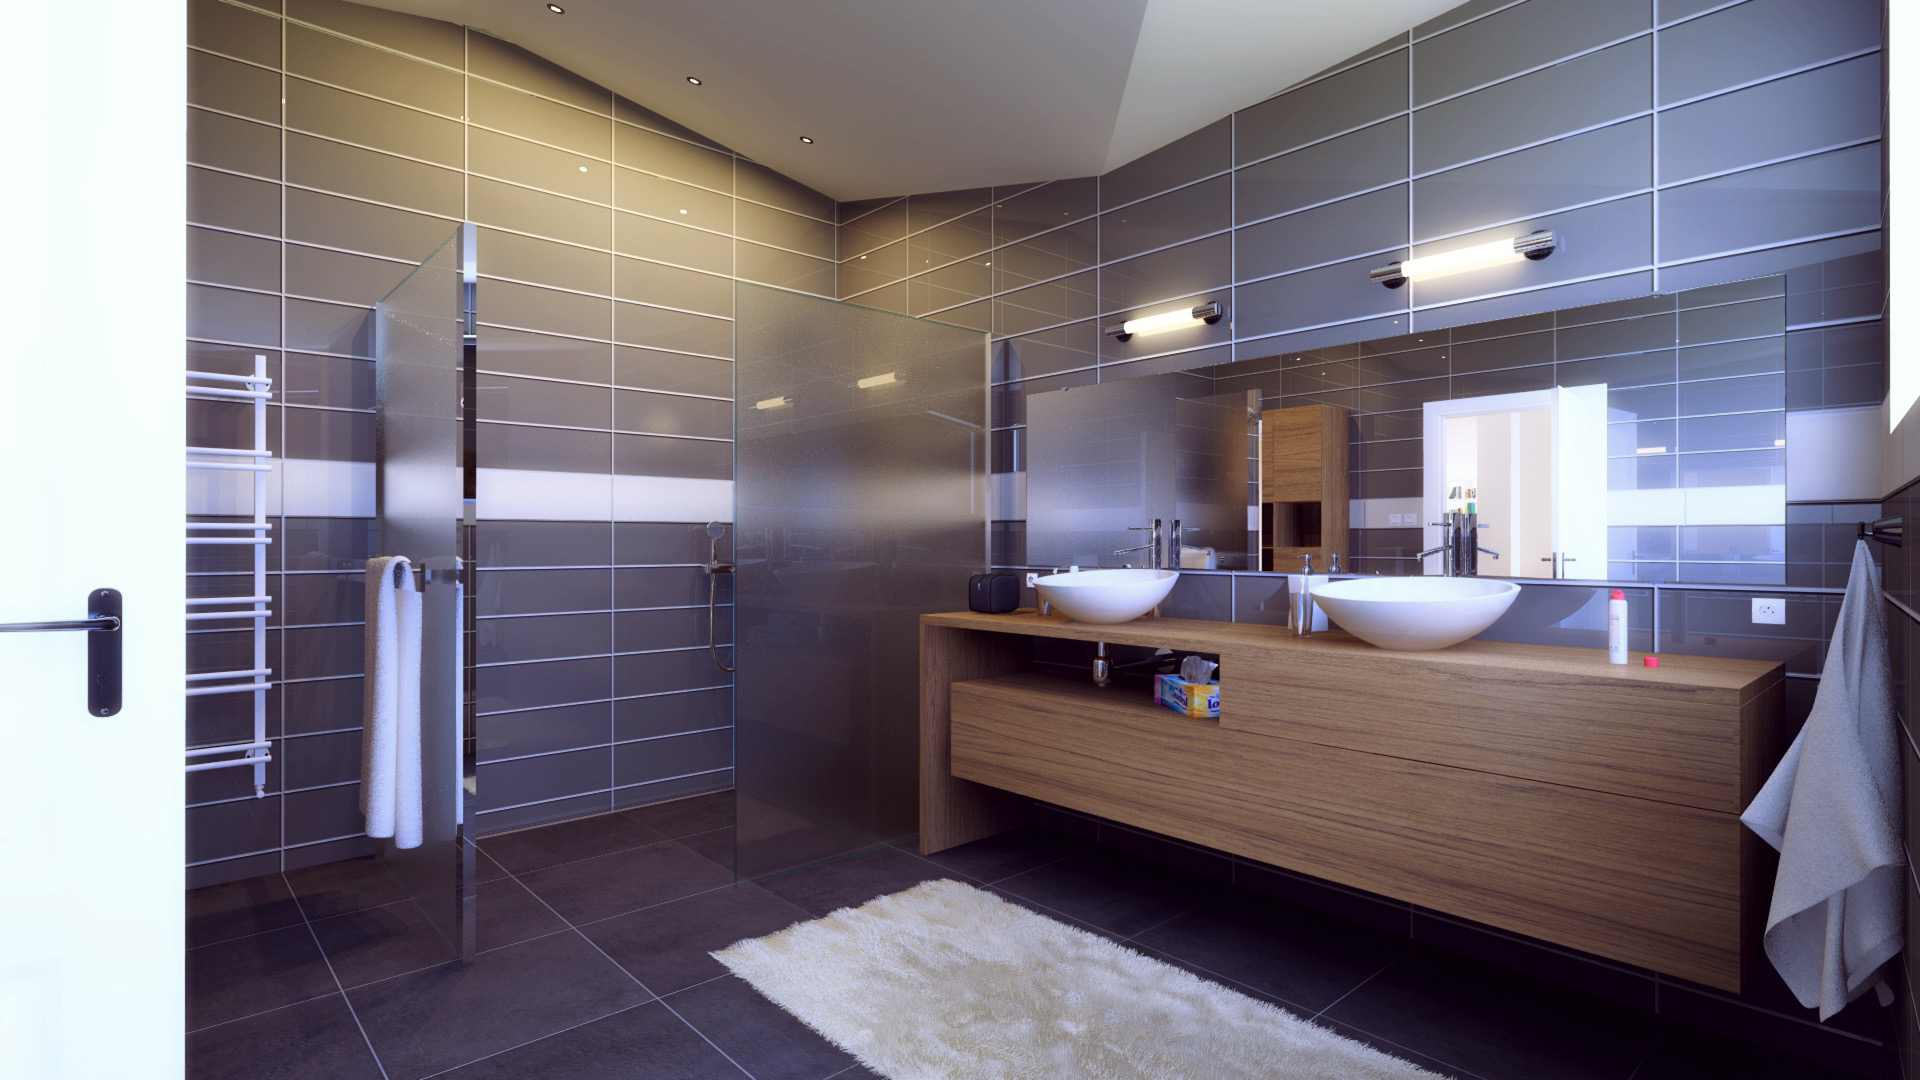
Interpolation adjusts lighting design errors, such as light spots in the image below, in which Precision and Hemisphere are set to 3:
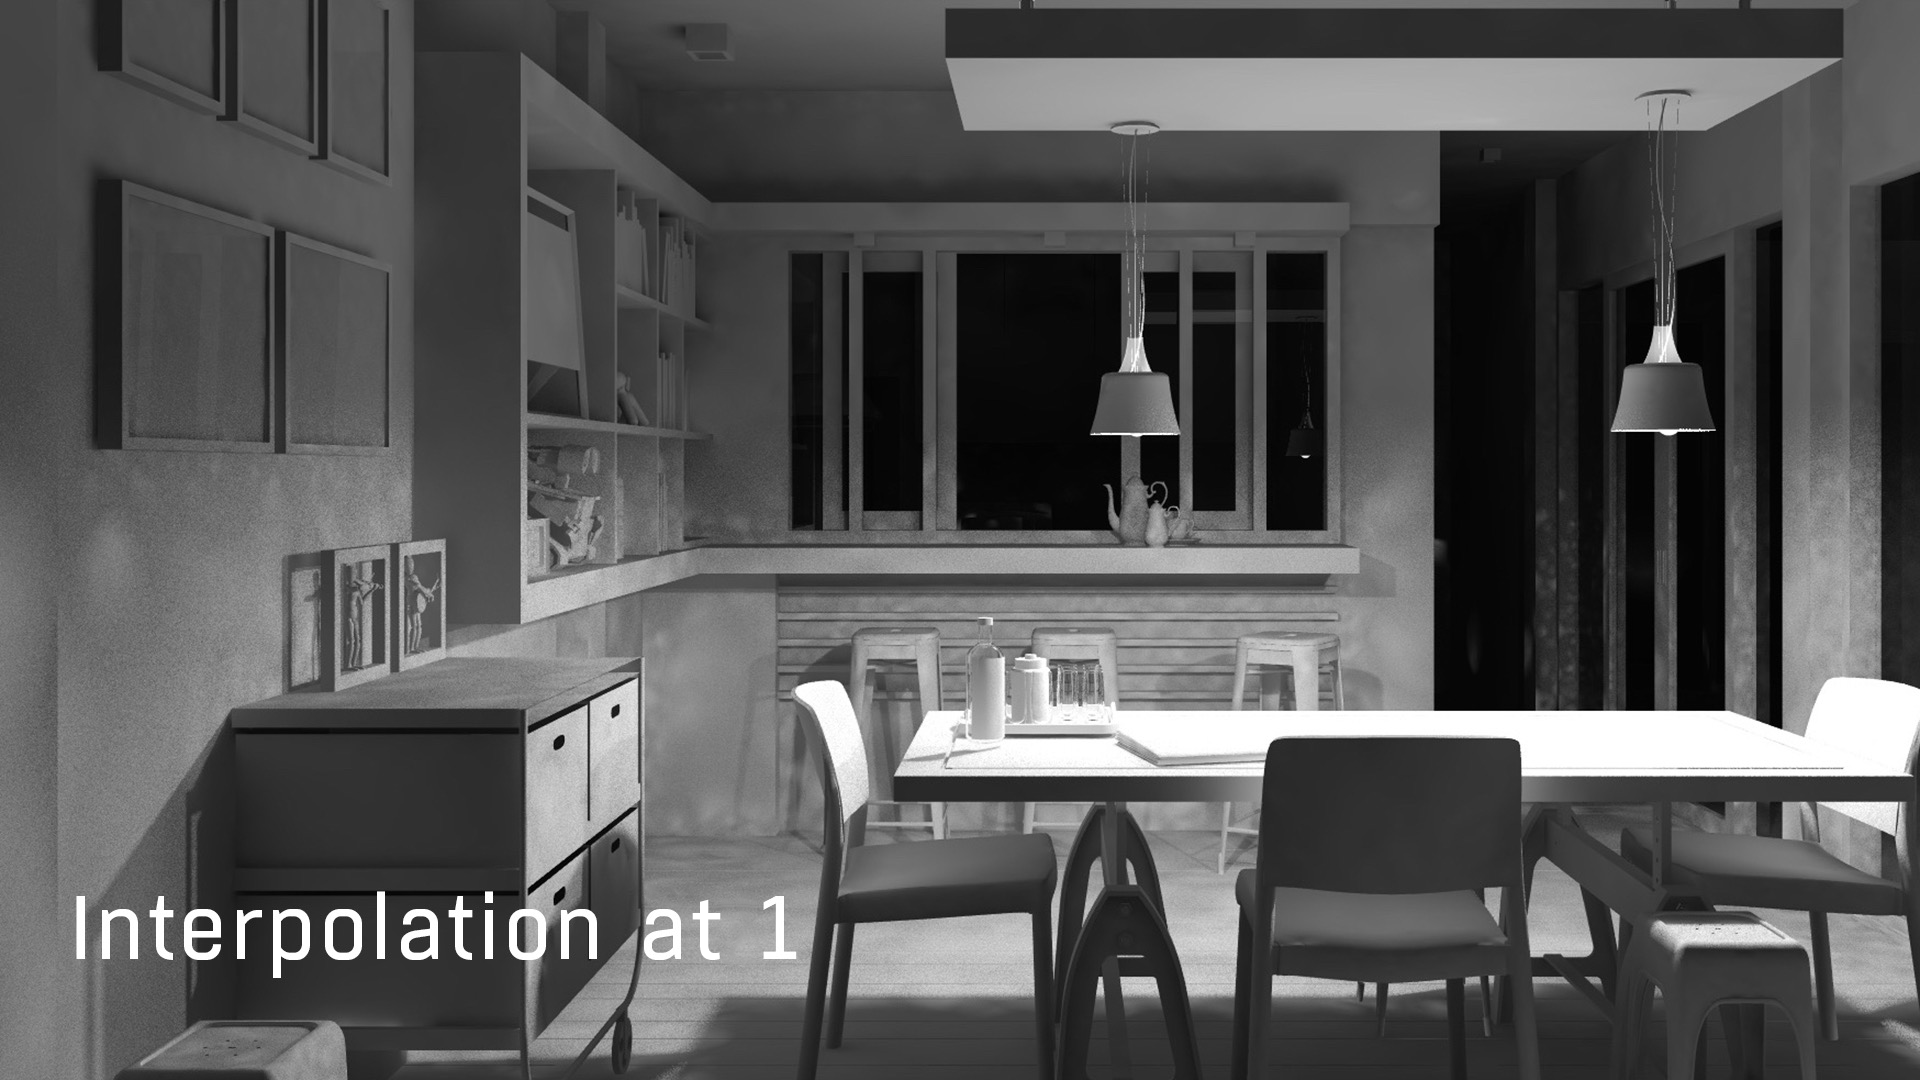
The more you increase the interpolation, the more the engine will smooth out the intensity differences. Interpolation at 5 is to be used in low light scenes, as in the image below that is calculated at night with only two light bulbs:
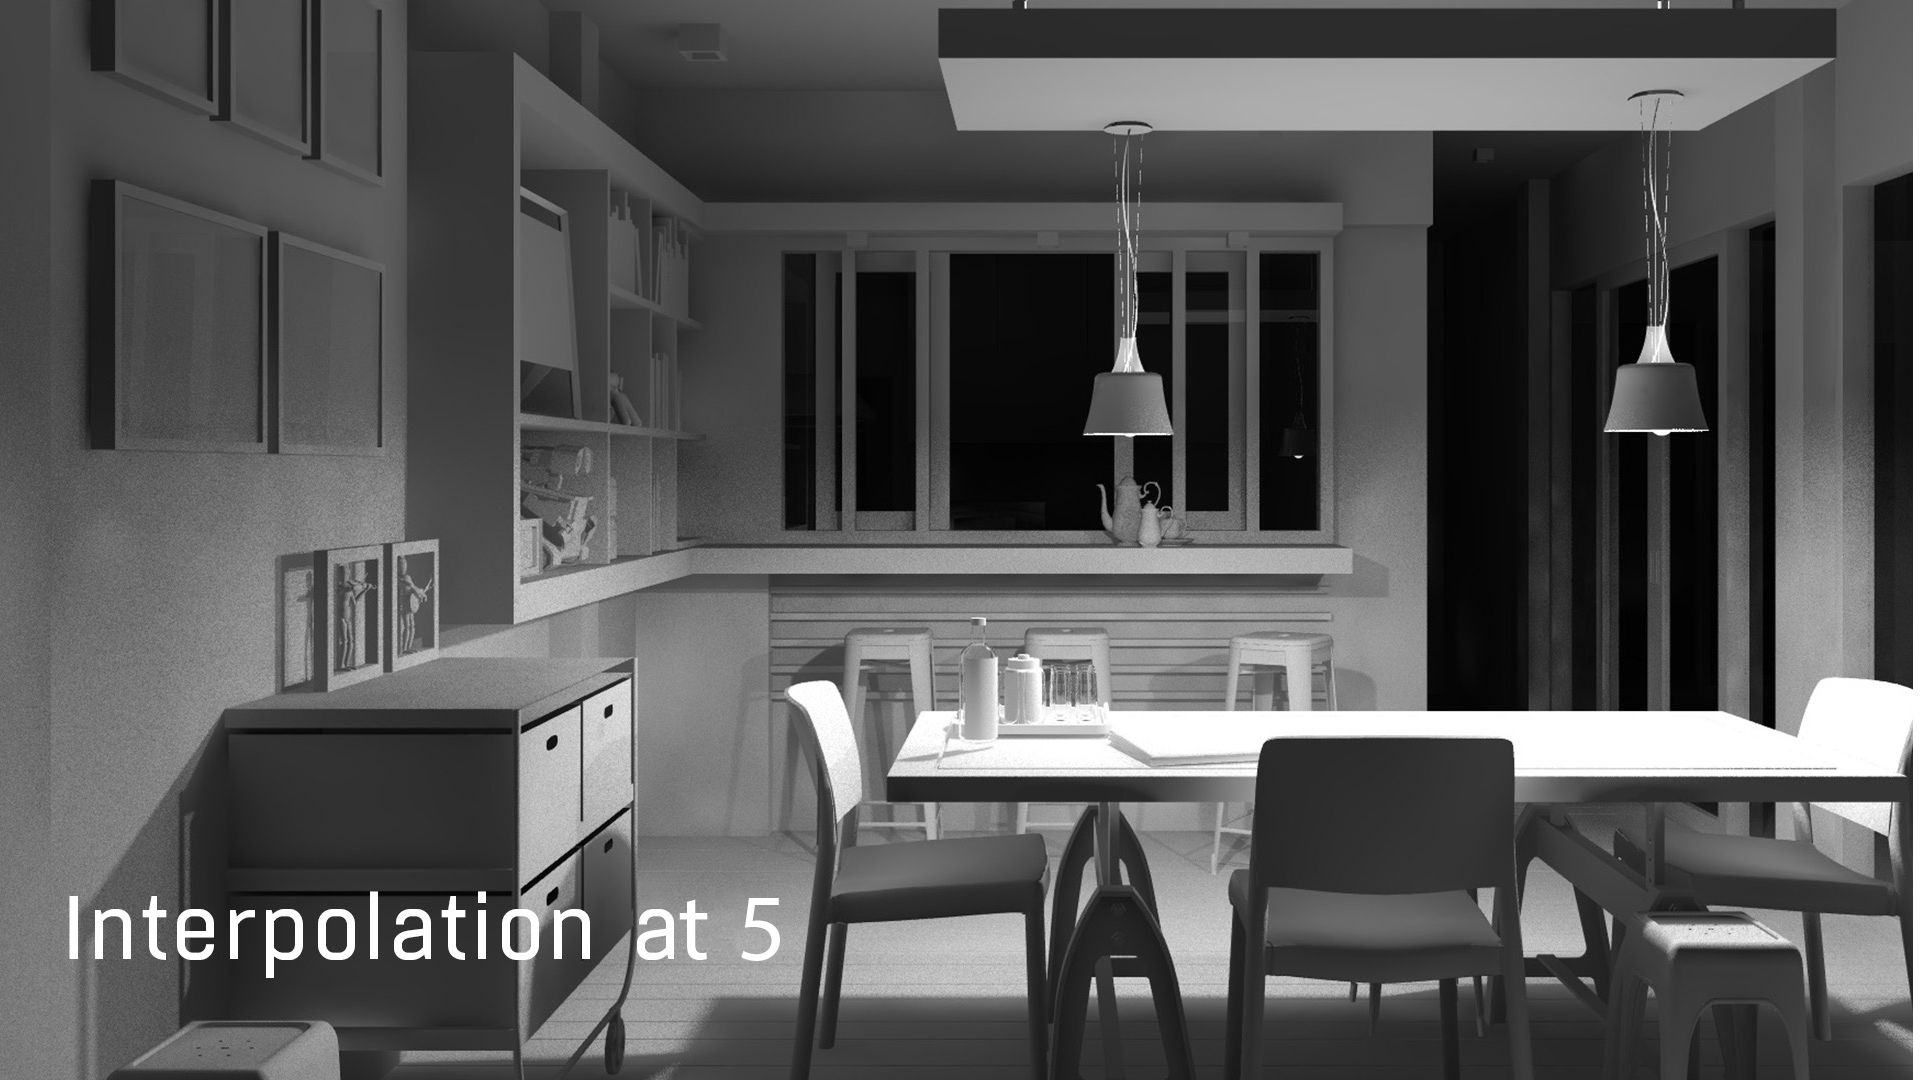
The spots on the walls disappeared without losing the details of the shadows.
In scenes that contain more light sources, it will not be necessary to increase the interpolation.
The calculation time does not increase much when you increase the interpolation value.
Tip: Use interpolation at 5 in case of a low light scene, otherwise interpolation at 1 is sufficient.
Sampling
Sampling is the crucial point in the engine parameters. It must be correctly used to optimize the “quality/rendering time” ratio. It is possible to set the sampling of materials and lighting.
Materials sampling
The more you increase the value, the more the engine will smooth the grain of reflections that can appear in the rendering of materials.
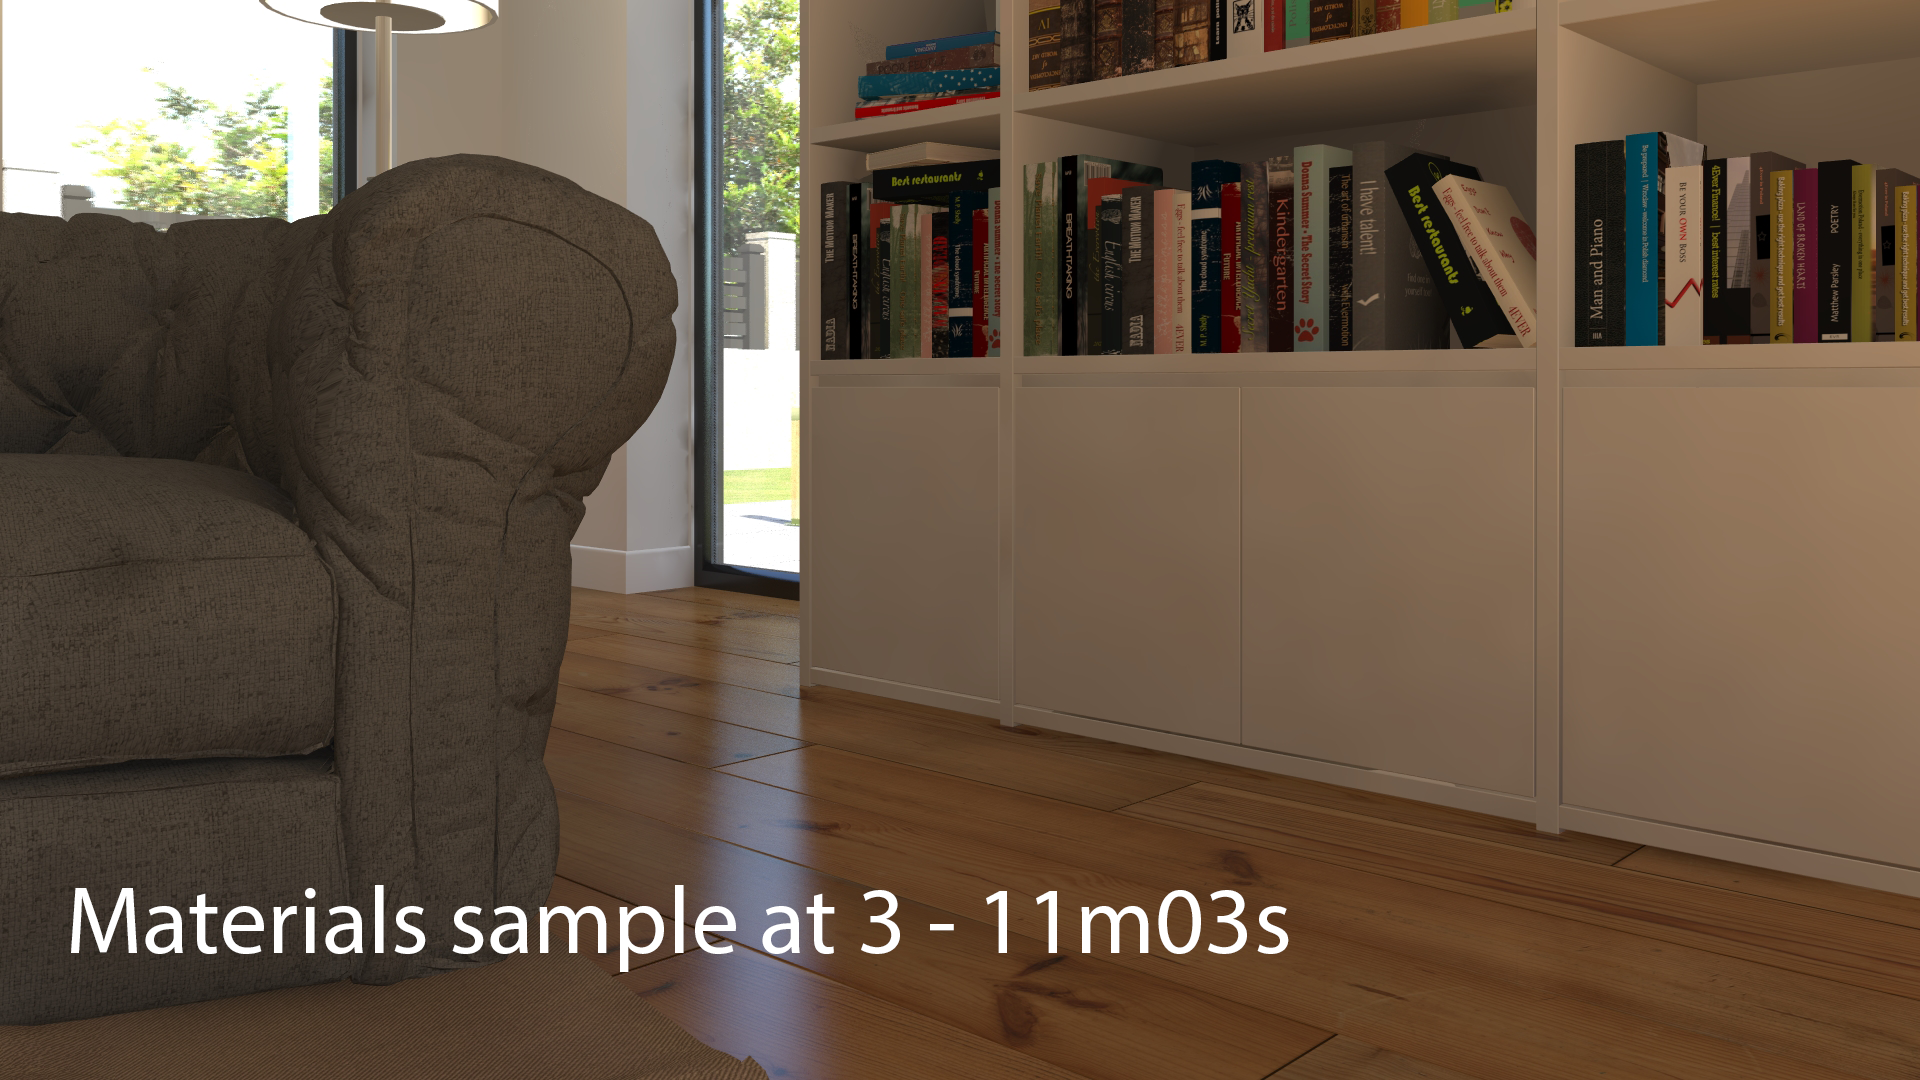
A sampling value of 3 removes 95% of the grain compared to the 1 sample.
However, the impact on the calculation time is very important, as can be seen in the images below, in which we zoomed in on the rendered image to better see the differences in the level of reflection on the floor:
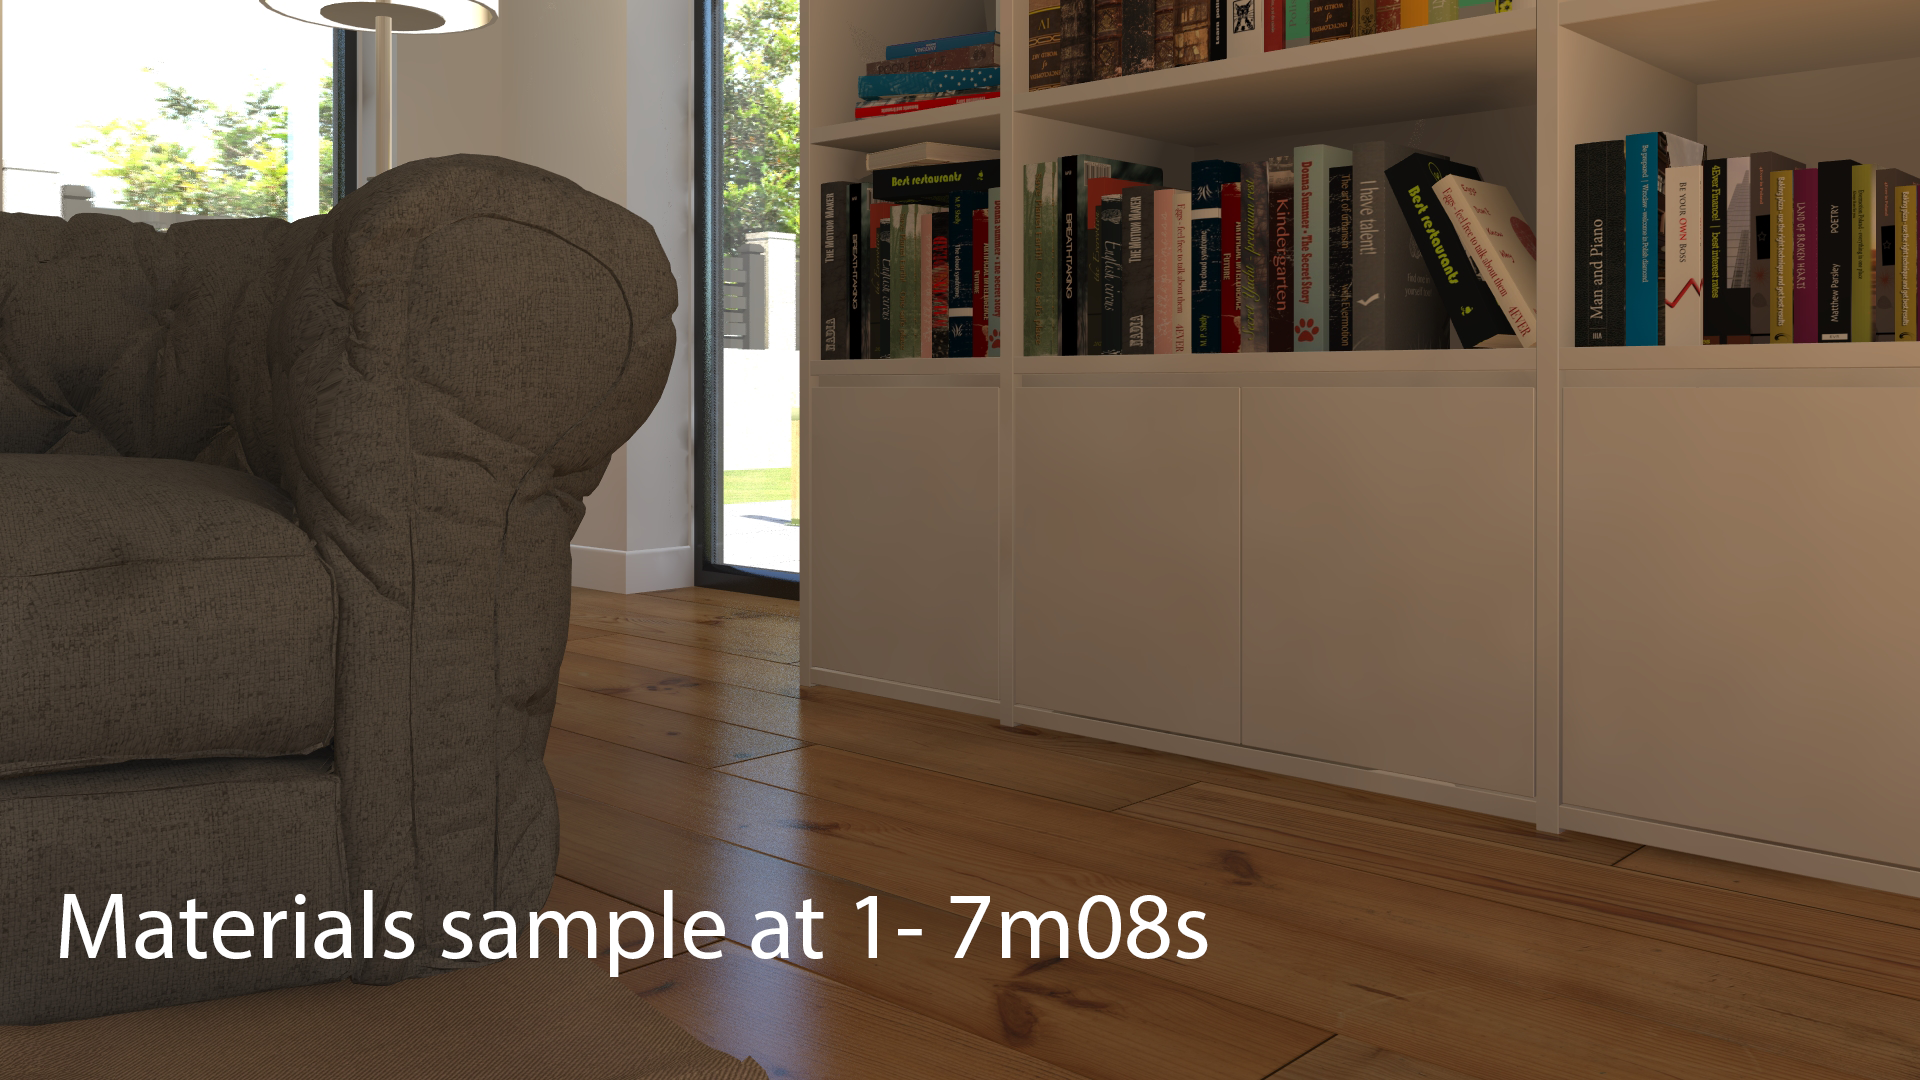

Tip: Use a value of 1 or 2 for fast rendering with little grain. For good quality in reasonable time, 3 or 4 will be sufficient in most cases. 5 is to be reserved for very special cases.
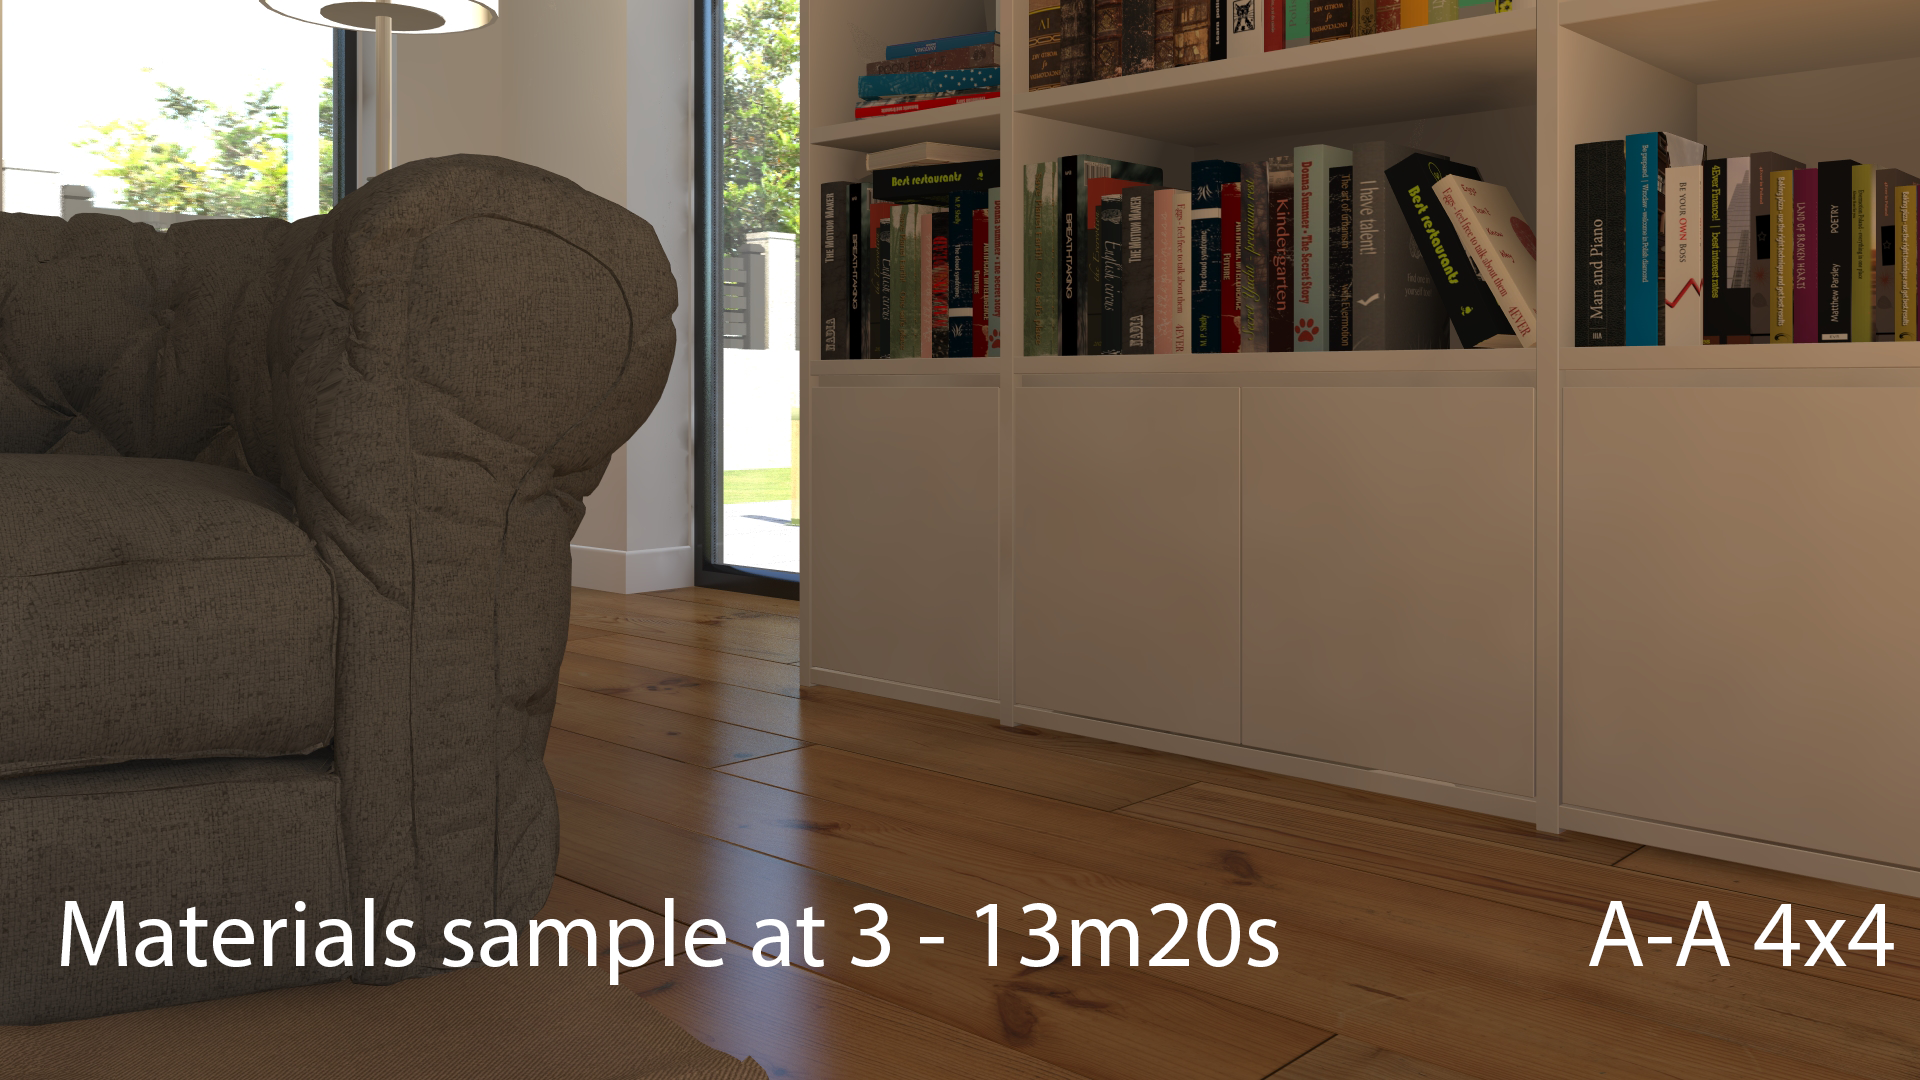
To reduce the grain without increasing the calculation time, we can also play with antialiasing. In our example, we kept the sample at 3 and set AA at 4×4. In this case, the calculation time goes from 11mn03 to 13mn20.

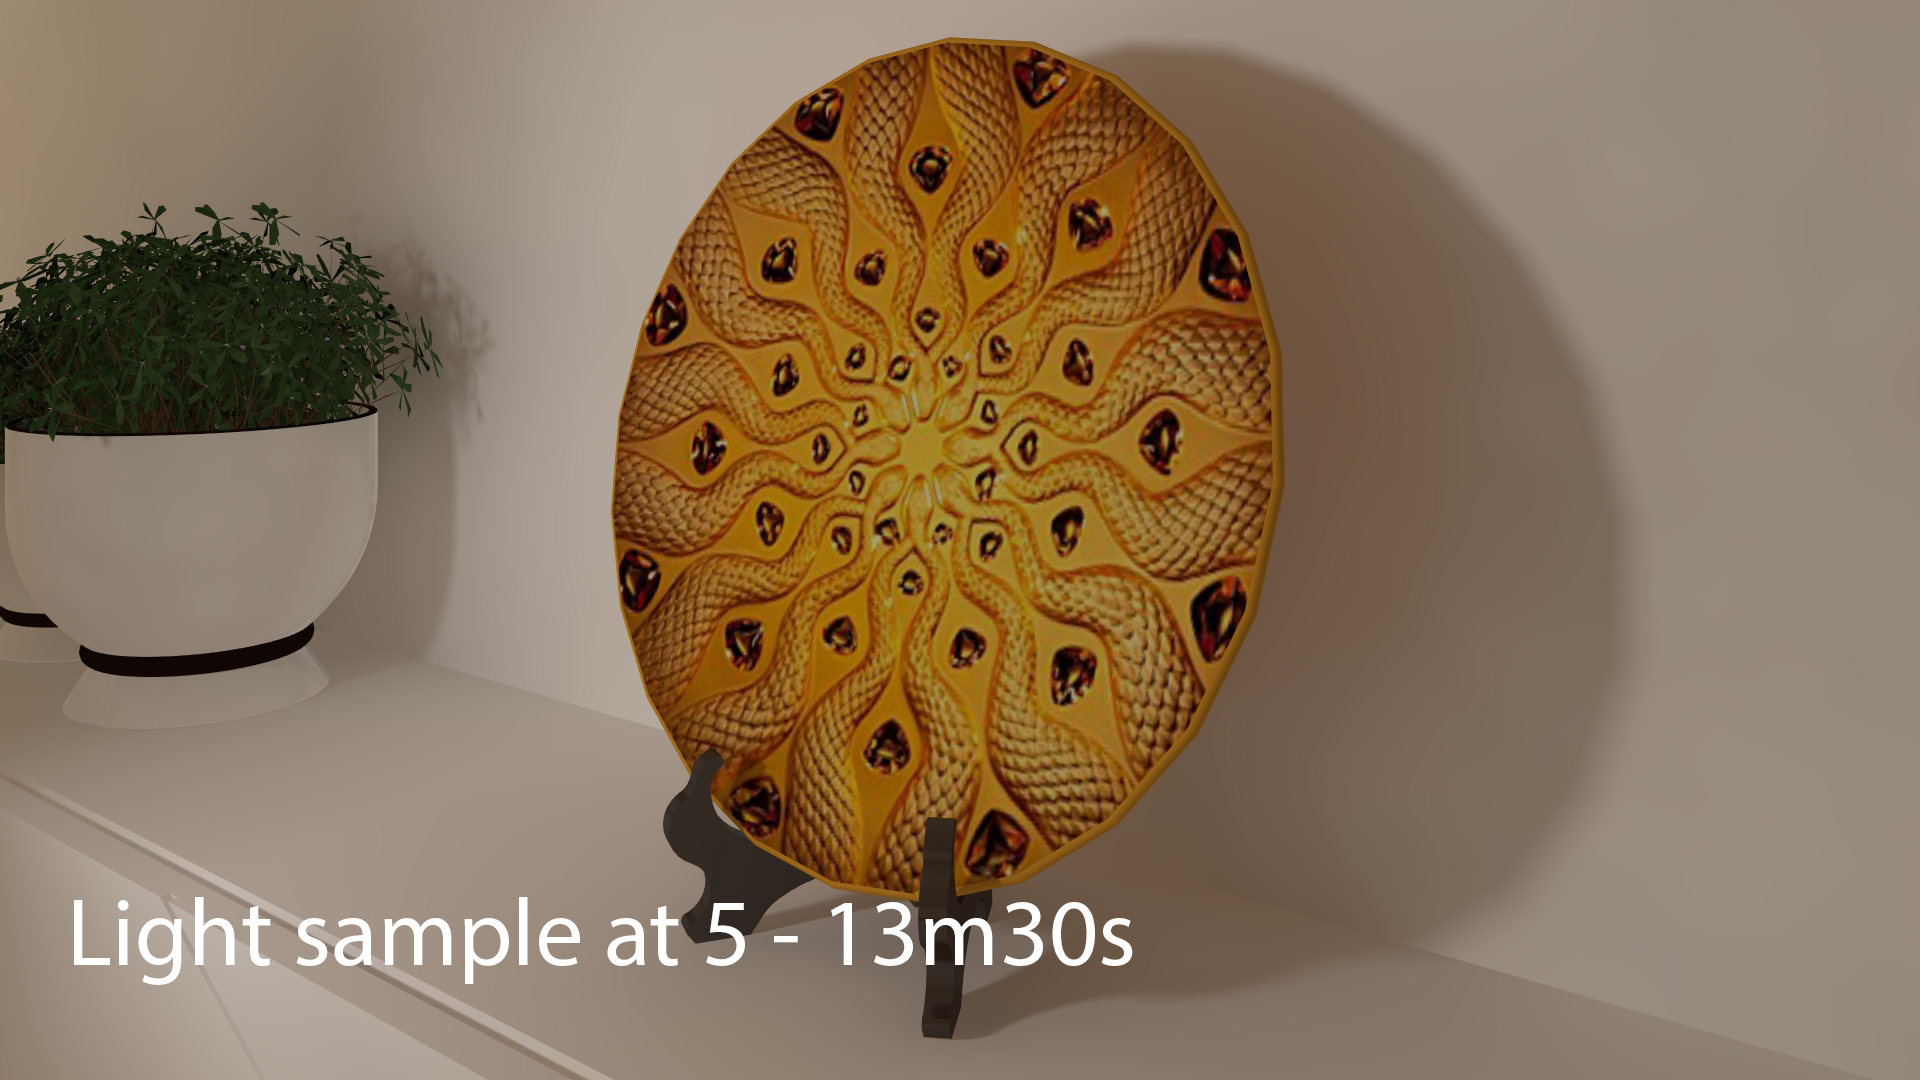
Light sampling
The more you increase the light sampling value, the more the engine will smooth the shadow grain.
It is not necessarily useful for artificial lights because there is very little grain due to artificial lights or neon shader. The rendering difference between 3 and 5 will not be visible to the naked eye, but the rendering time will be significantly increased.

On the other hand, if we activate the option of the “enhanced background”, we will see a clear improvement between the sampling at 3 and at 5.
When we check “Enhanced Background,” the sky will emit direct light at 360 °. To see the effect in the preview, click on the « refine » button.
This option adds a lot of realism to the image but adds grain and increases the calculation time. To smooth the grain, it is necessary to set the sampling to 5, so the calculation time can be multiplied by 4 or 5.

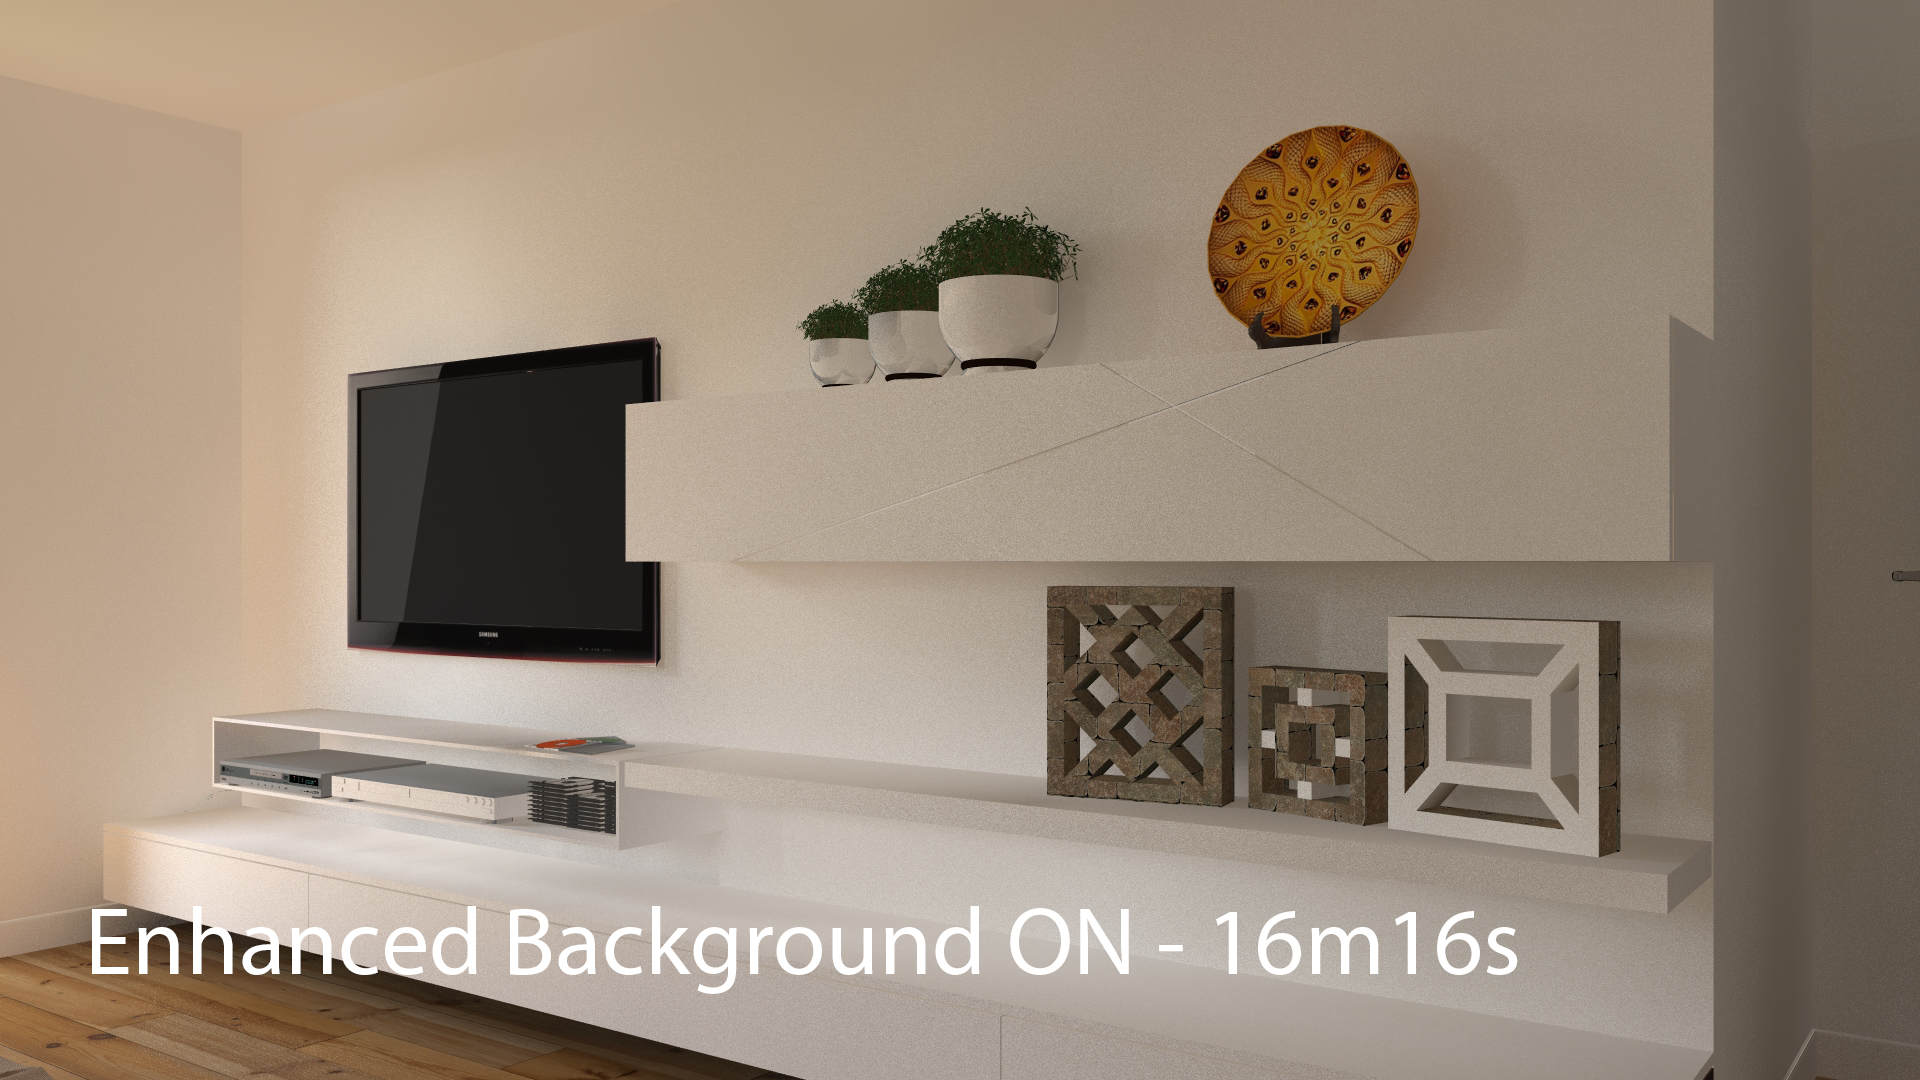
Tip: Sampling lights at 5 is mandatory if you use the “enhanced background,” otherwise a setting of 3 is more than enough.
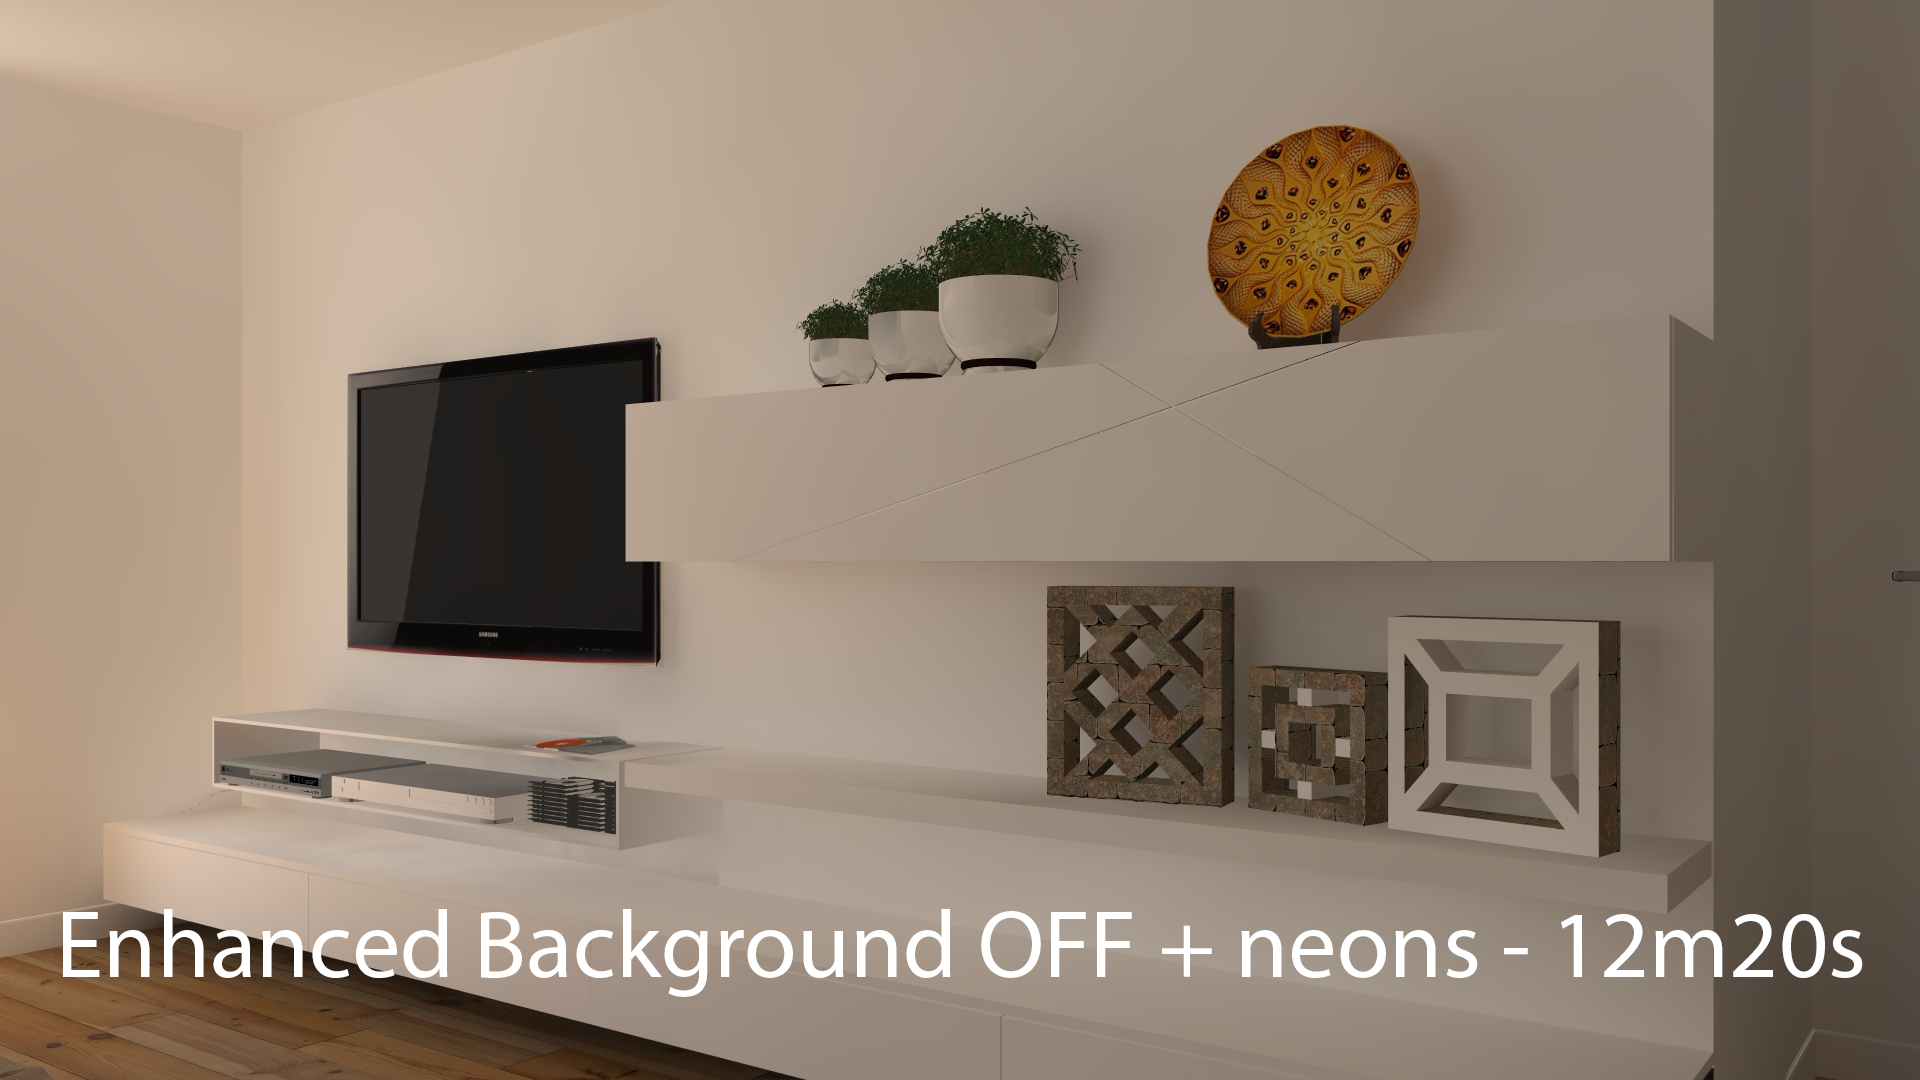
Another way to increase realism without using the “enhanced background” option is to use a “neon glass” shader on the scene windows, which will bring more light into the scene, but will not consume as much computing time:
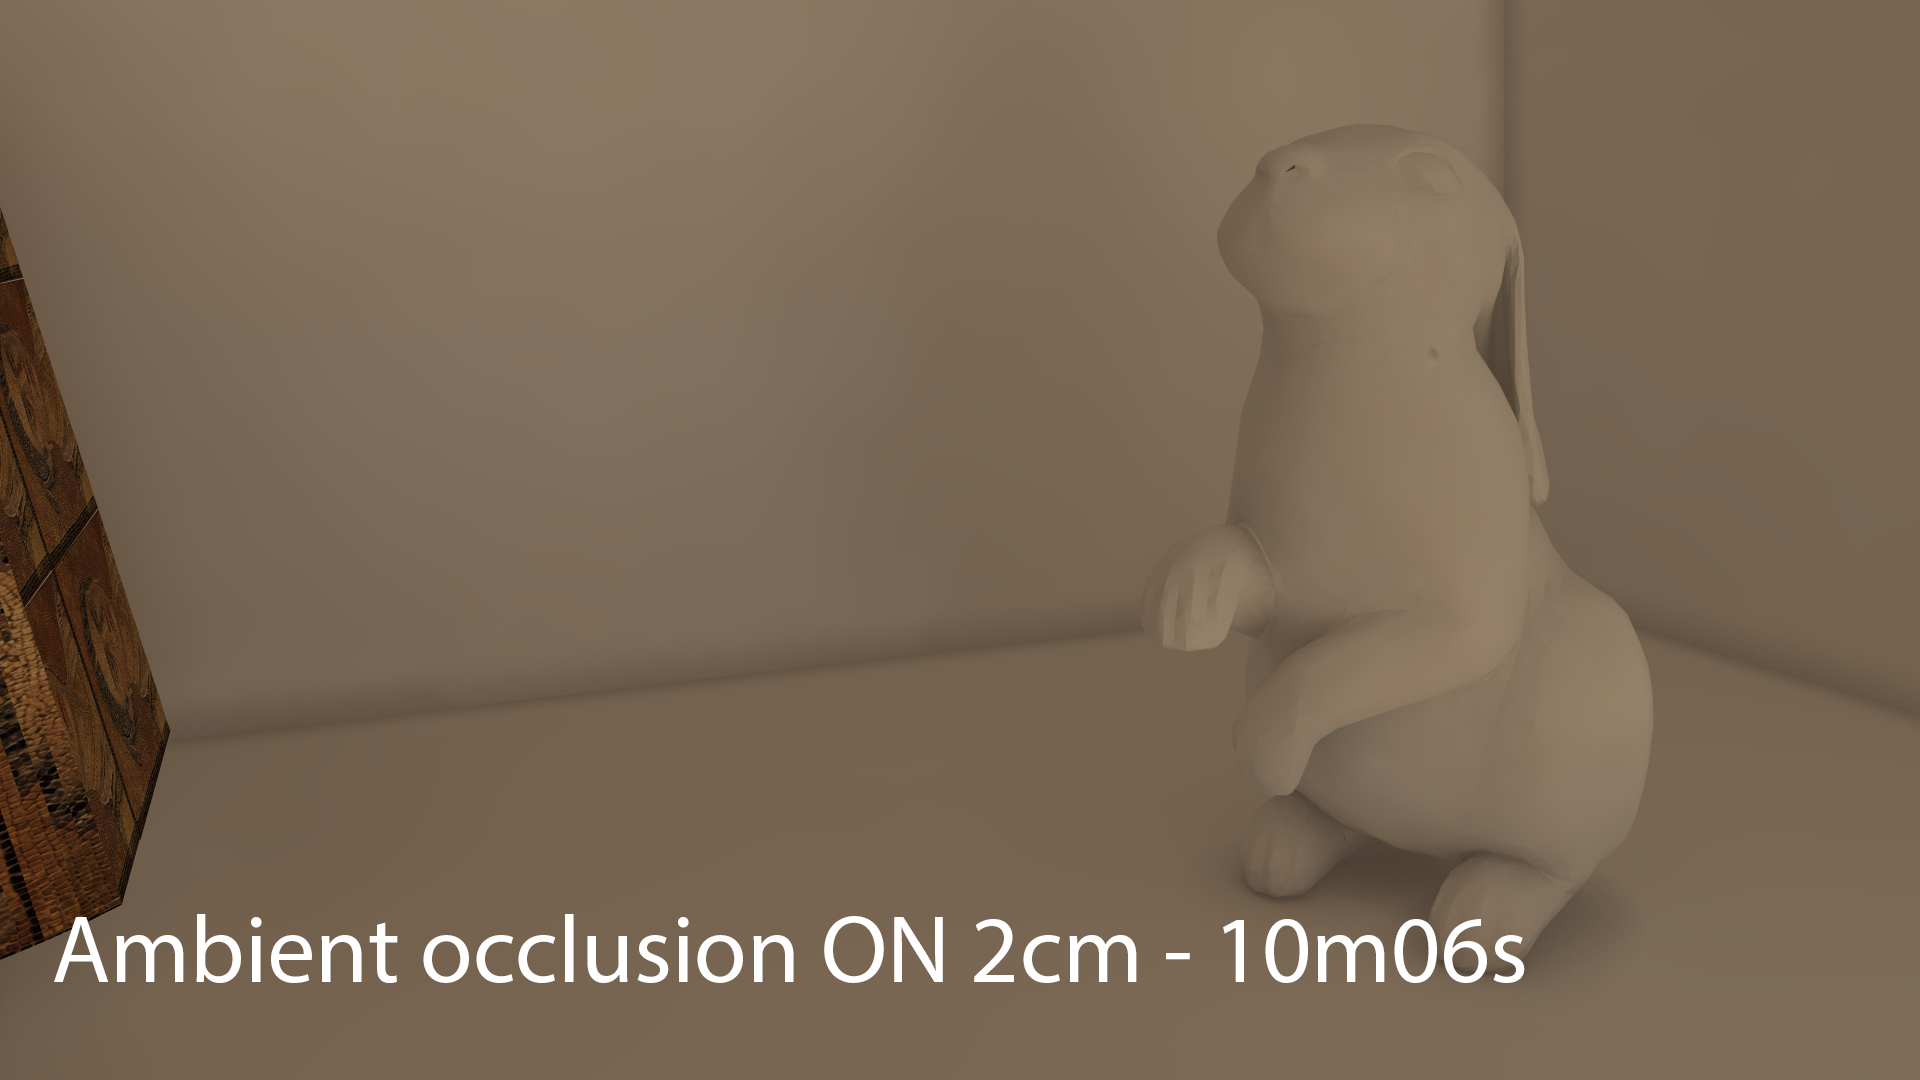
Ambiant occlusion
This effect calculates fake shadows in all the details of the geometry; it makes it possible to add relief to the rendering with a very reduced impact in calculation time. To view the effect in the preview, click on the « refine » button.
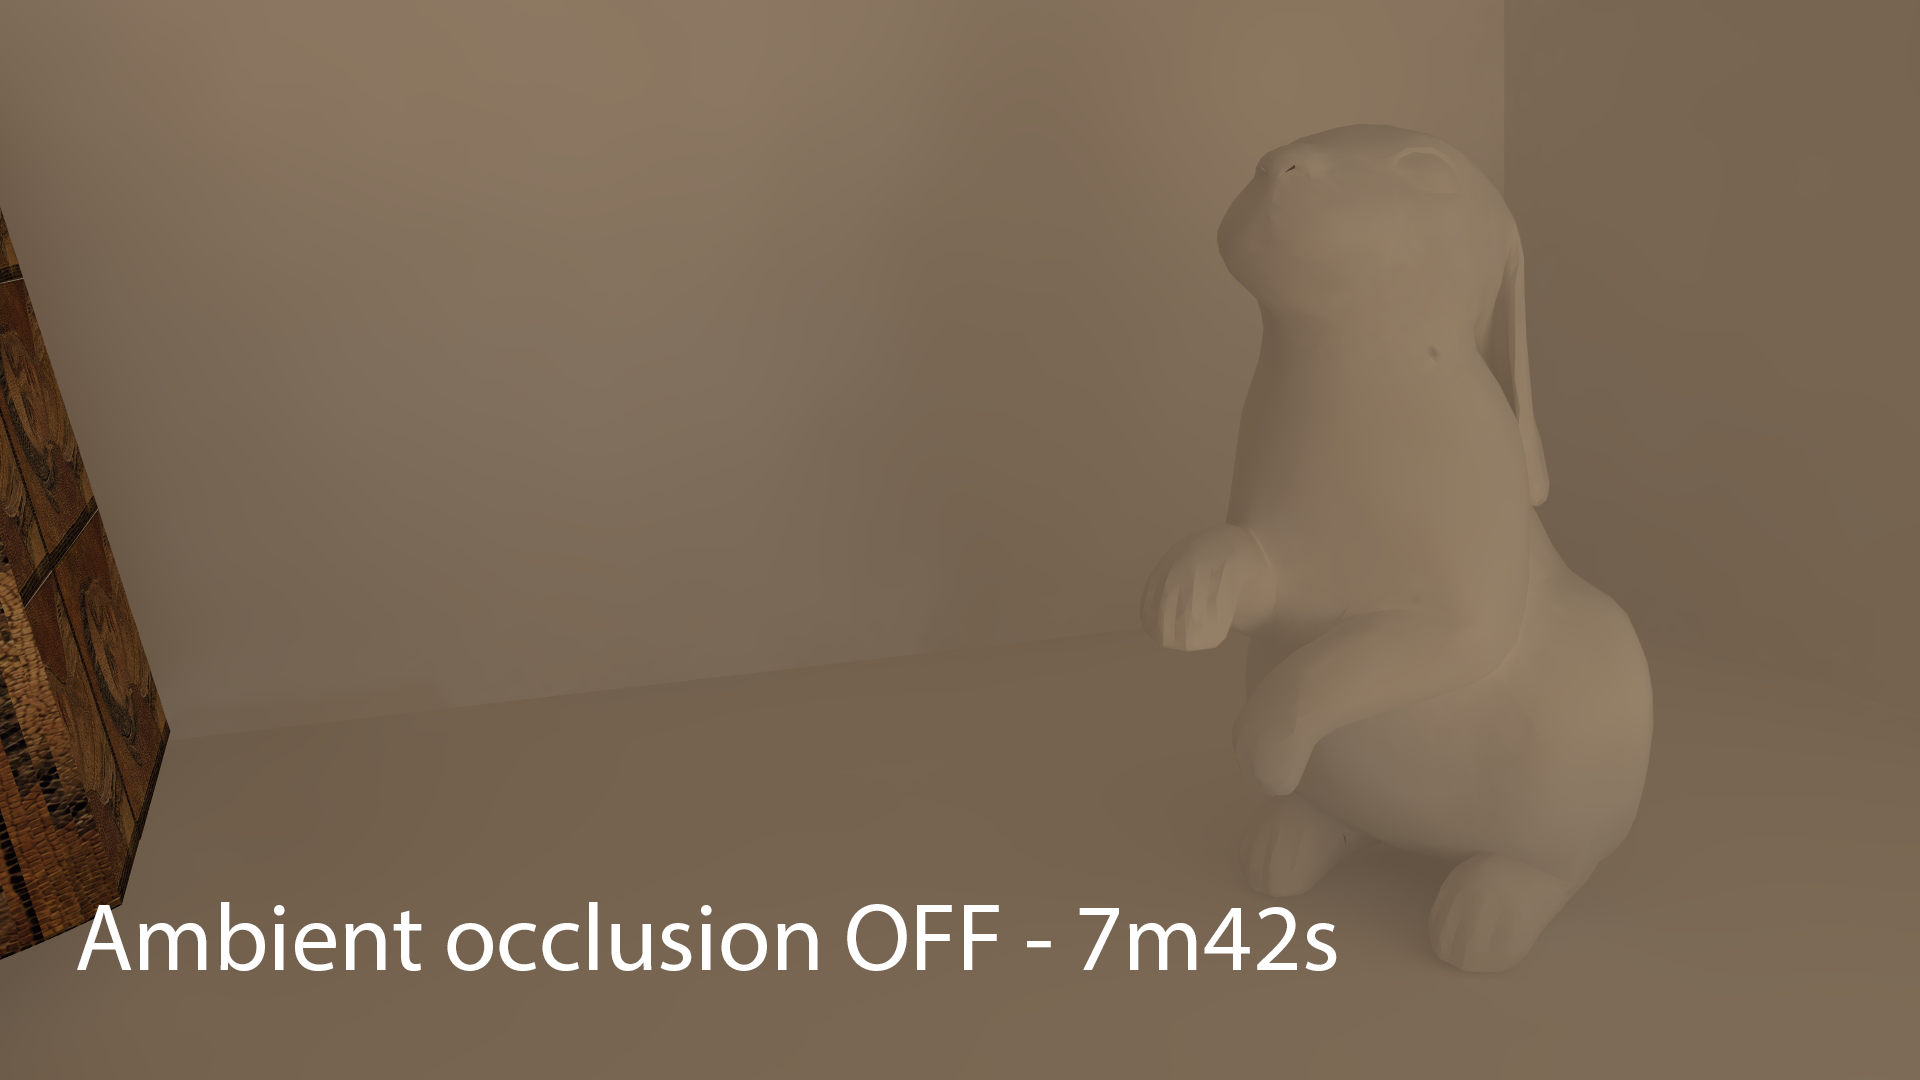
The size and intensity setting depend on the position of the camera in relation to the scene as well as the size of the scene. If the camera is near a small object, we will put 1cm and 0.3 intensity, however, if it is far from a large building we can use a size of one meter and a higher intensity.
Exposure vs. ISO/Shutter speed
In order to have a correct rendering regarding colorimetry, lighting and adjustment of the lights, we recommend working in “ISO / Shutter speed” physical adjustment. Exposure is to be reserved to lighting with an HDR image.
Tip: Use “ISO / Shutter Speed” mode in all cases except with Background HDR illumination
White balance
Can be useful for finding a neutral tone on whites and grays when you find, for example, that the walls are a little yellowed by the lighting.
We will now examine other elements of the scene that can influence the quality and rendering times.
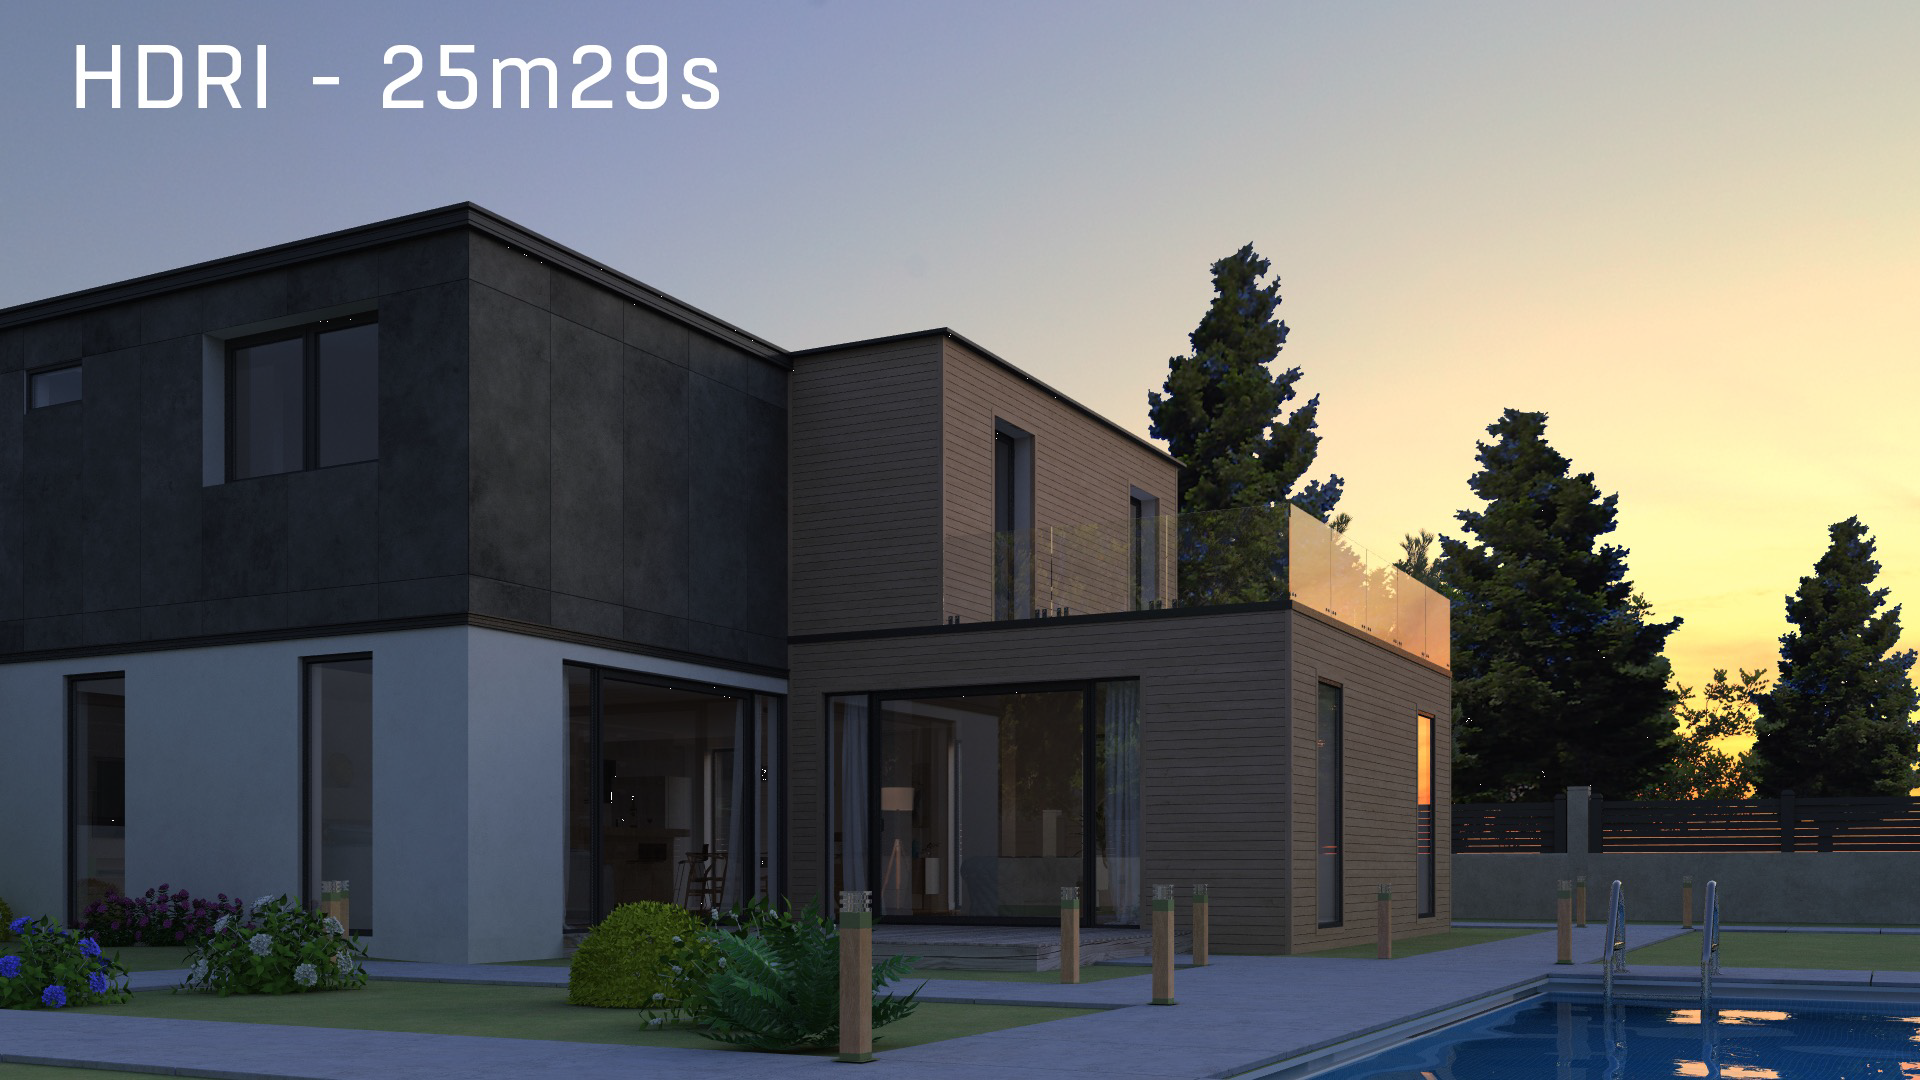
HDRI background image
If you are using an HDRI image to illuminate an outside view, we advise you to check the enhanced sky, set the light sampling to 5, enable the exposure mode and white balance, and do not activate heliodon lighting.
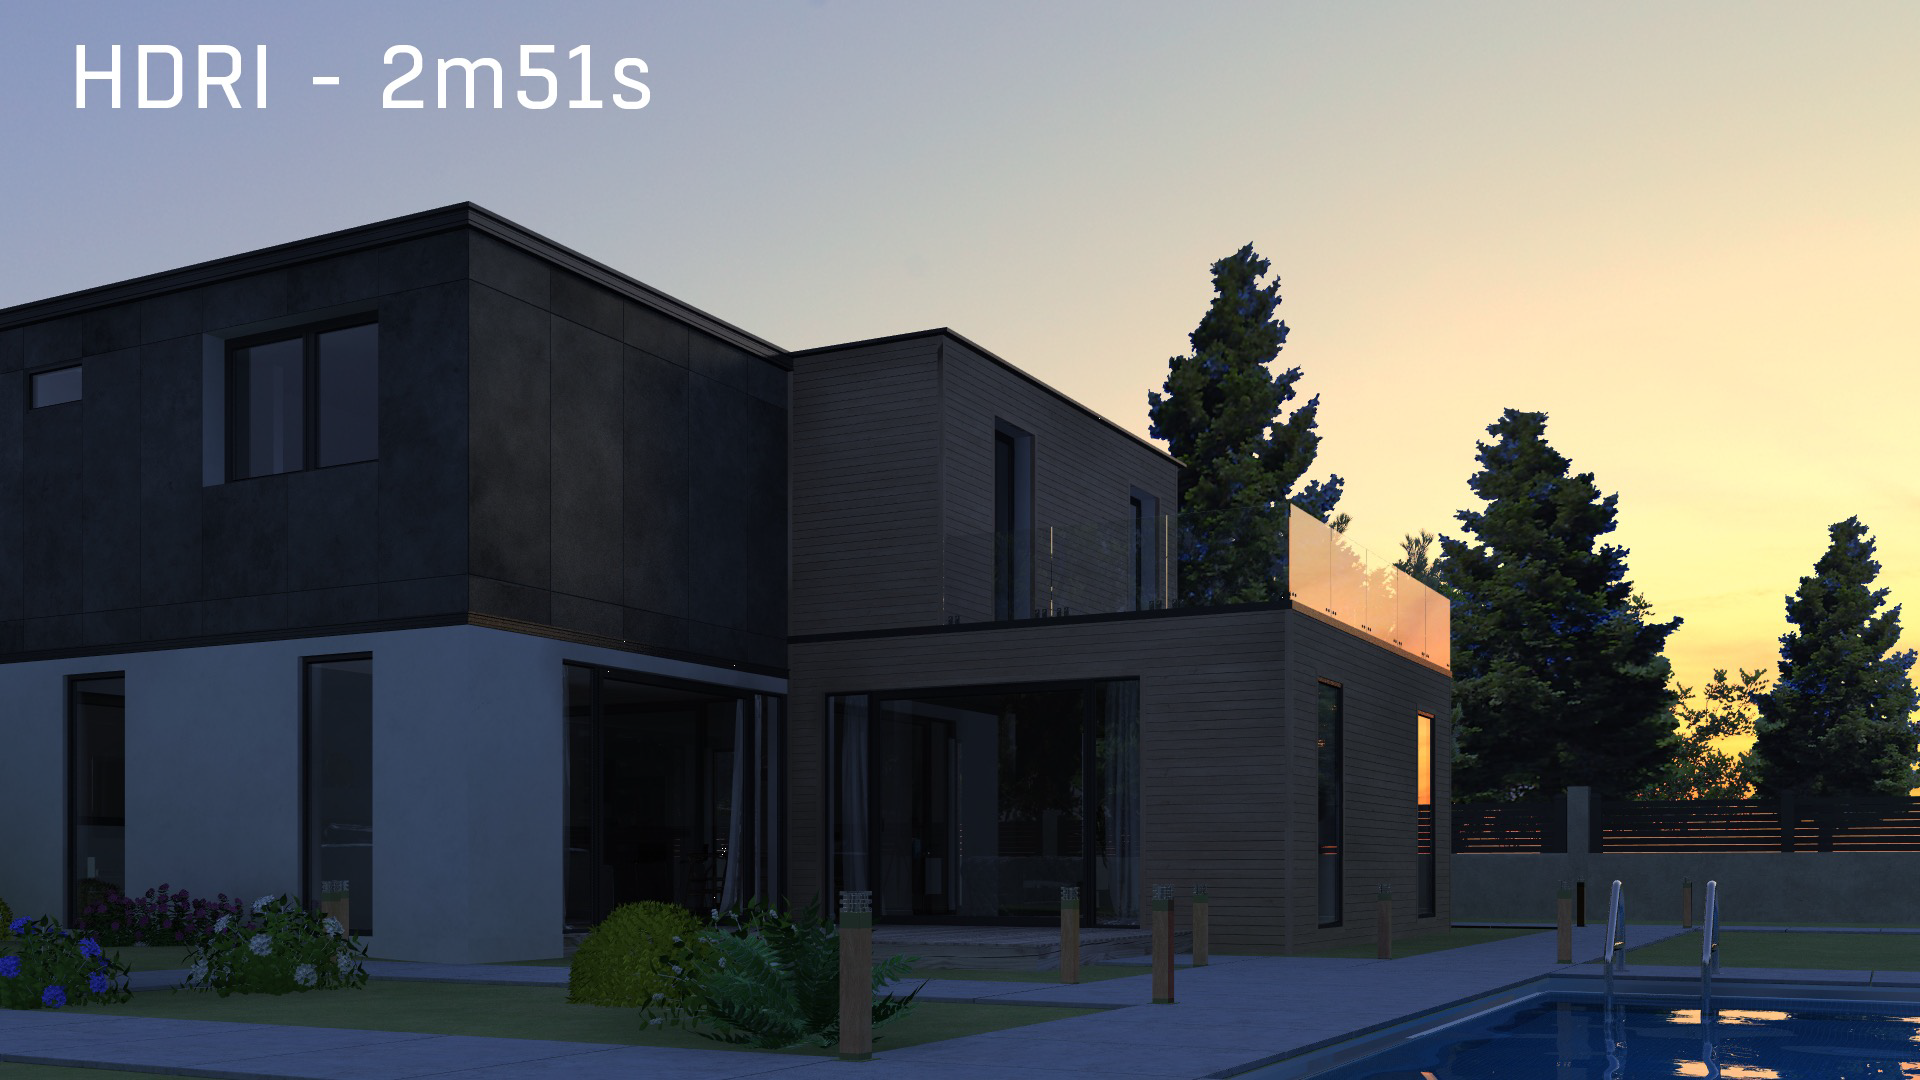
With enhanced sky and light sampling set to 5; the light enters the room and the sunset simulation is much better:
Light cone
The Light cone is very greedy in calculation time, and there is no adjustment to reduce this calculation time; we advise you to use it only if you do scenography studies, for example.
Materials shininess
The shininess setting has changed compared to version 5. The reflection is already very blurry with a shininess value of 750, while in version 5, to get the same result the shininess was at 50. In version 6.5, the computation time increases significantly when decreasing the shininess value below 750:
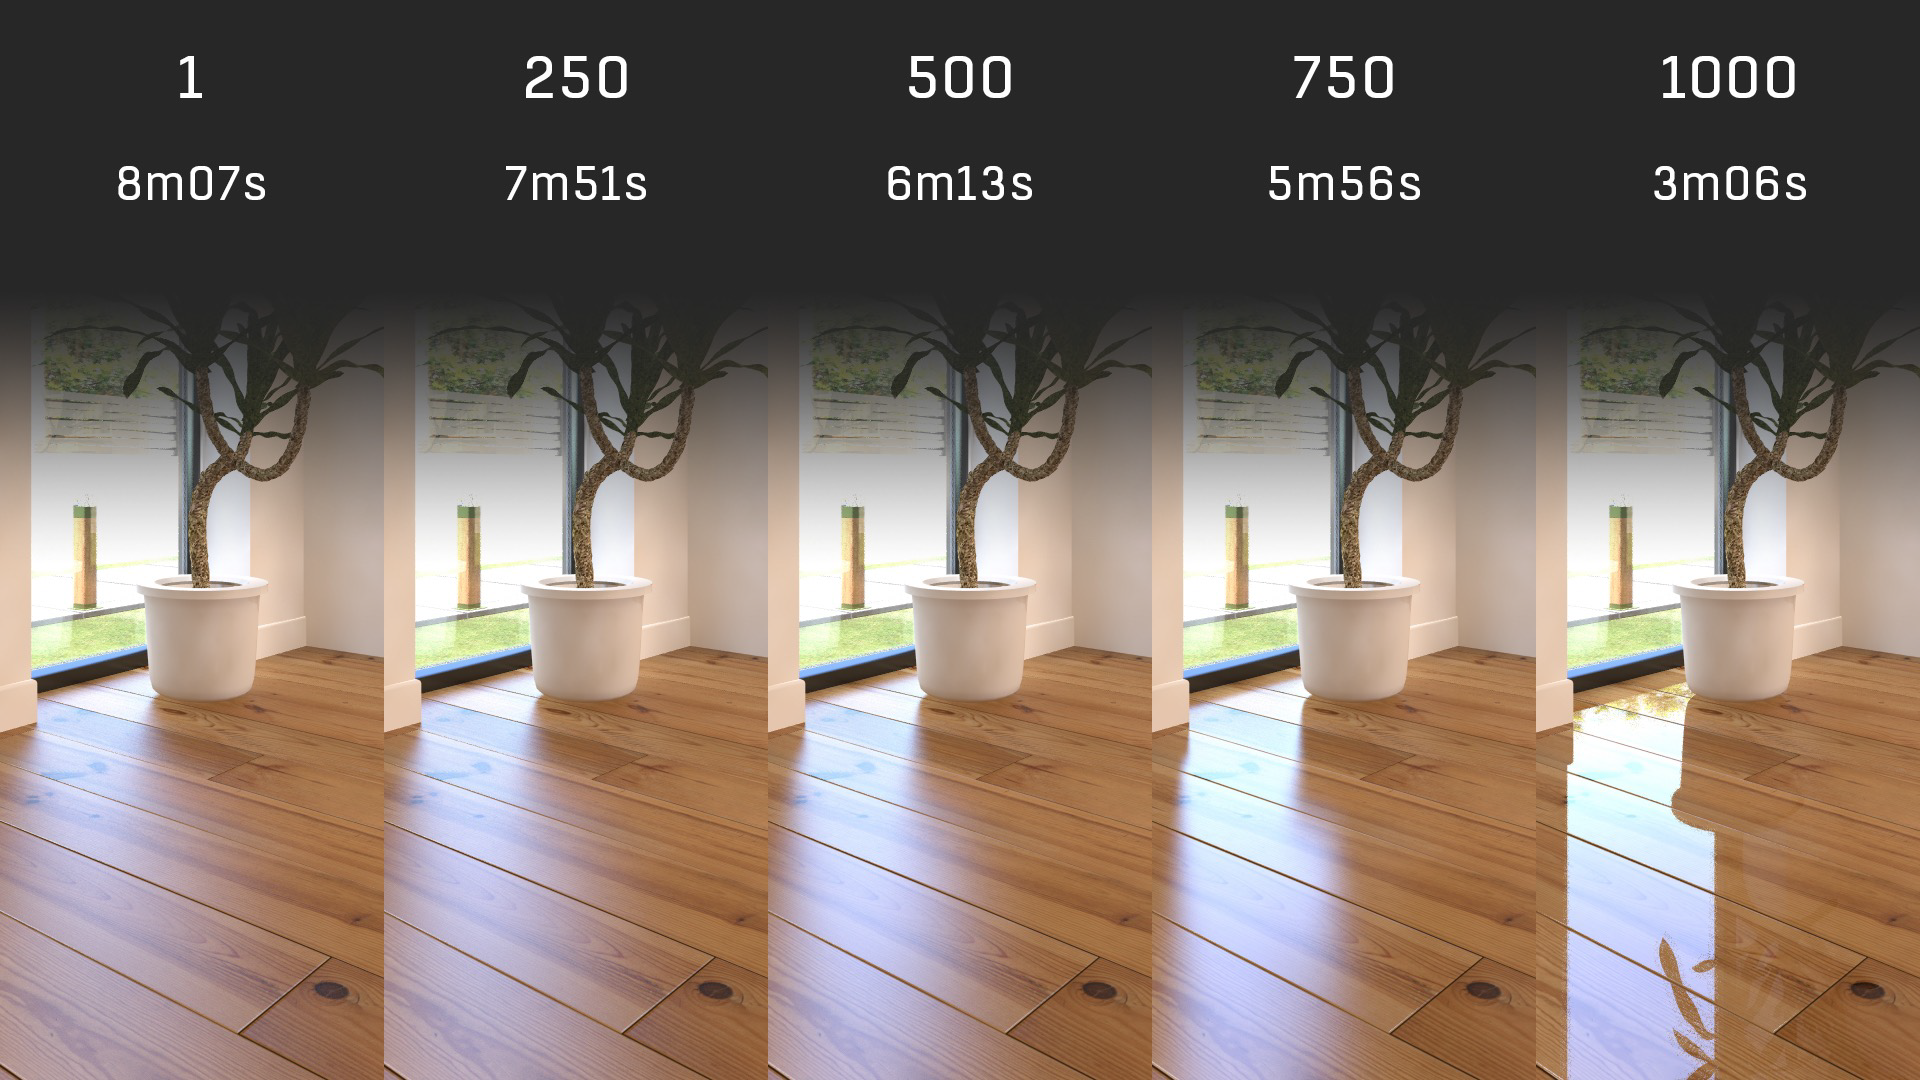
So if you open a V5 file, you should always check the shininess values to avoid a significant increase in the calculation time in V6.5.
The materials sampling value and the shininess are the two most time-consuming parameters regarding the materials rendering time.
Tip: Use a shininess at 750 for a good quality blurred reflection. Be careful not to have too many pixels to blur in % of the image.
Sandblasted glass
For a sandblasted glass effect, we play with the blur of refraction. The blur is also dependent on the distance of the objects seen through the sandblasted glass.

Tip: To obtain the sanded glass effect without increasing the calculation time, you must suppress the reflection (ie: black reflection color), increase the shininess of the reflection to 1000 and adjust the refraction shininess to 980.
Neon shader
In version 6.5, the neon computing times are equivalent to those using artificial light. On the other hand, it is necessary to pay attention to the number of polygons of the geometry on which the neon is applied. Indeed, to calculate the lighting, a ray is launched from each polygon with Neon shader.
Tip: Do not apply the Neon shader on too detailed geometry.
Neon glass shader
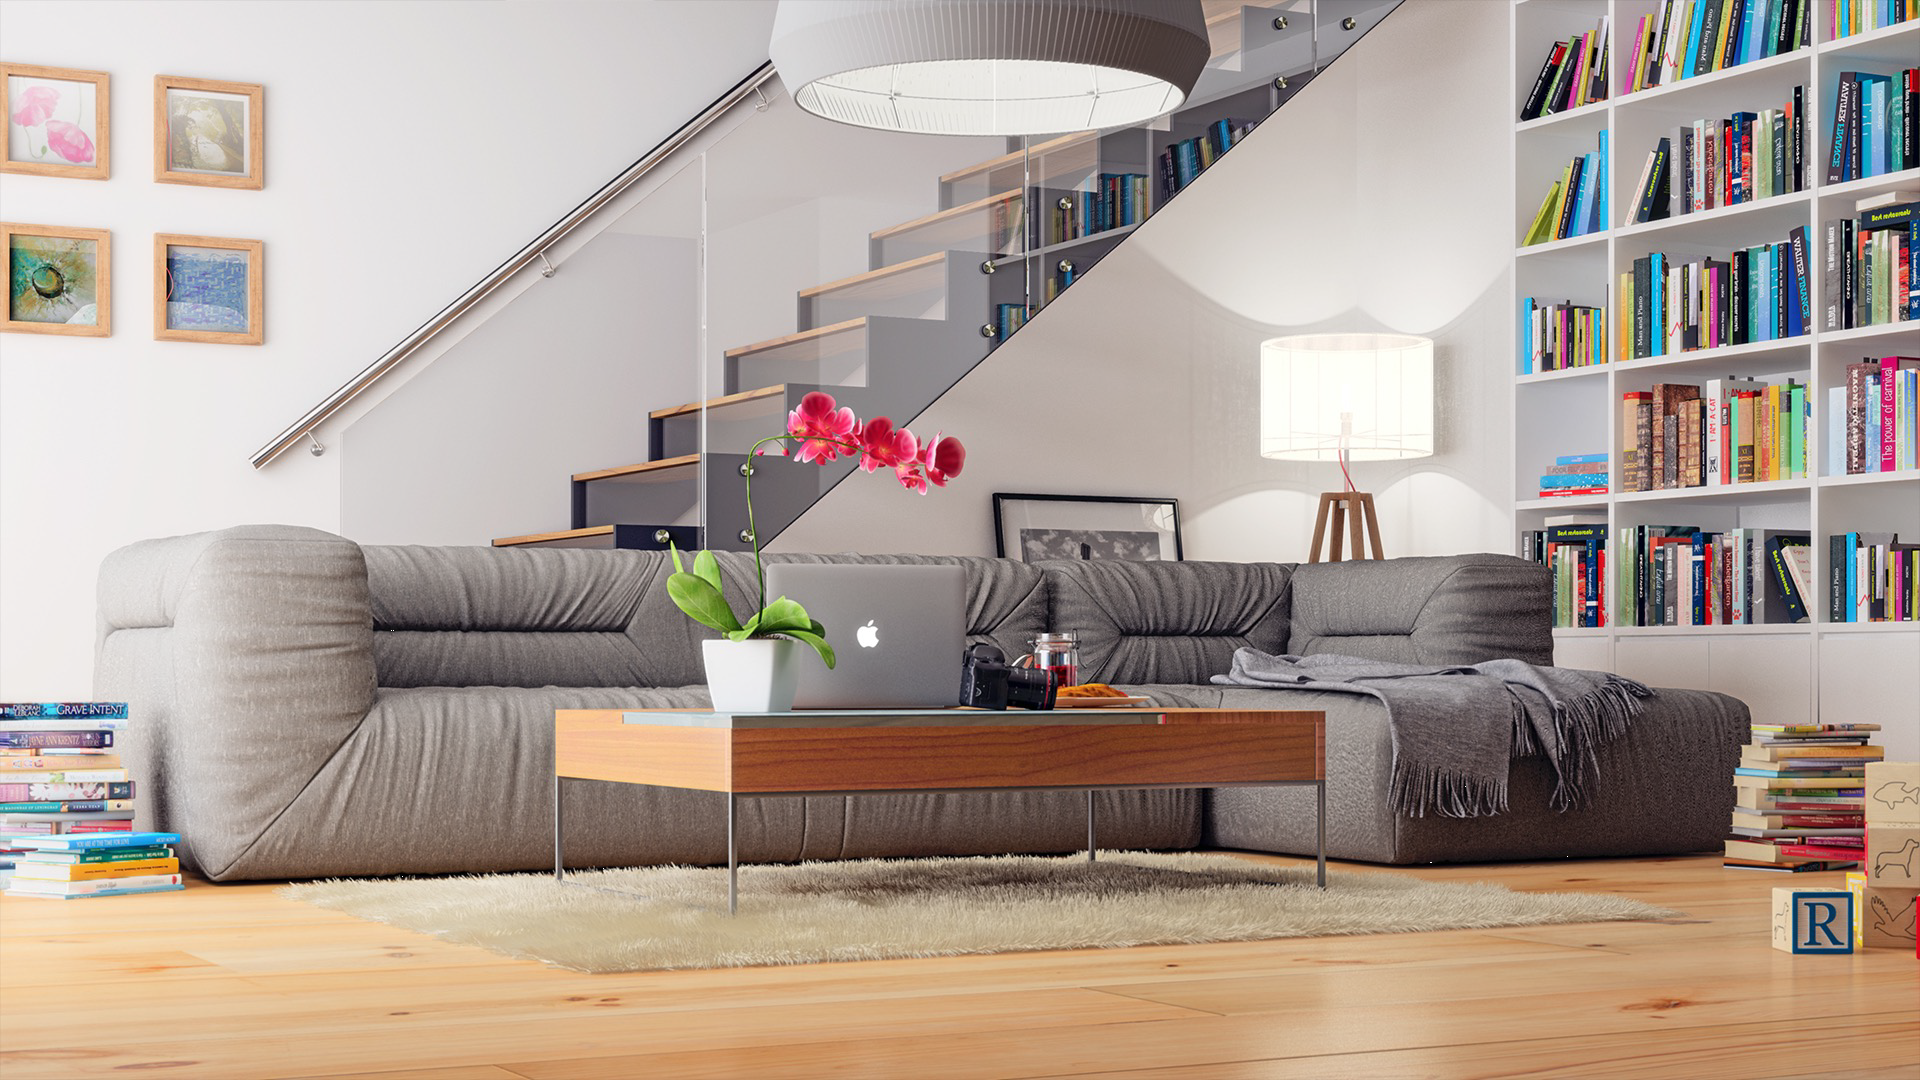
Neon glass shader can be used to enhance the lighting of a scene and give it more realism. In the image below only the artificial lights and the neon glass were used to illuminate the scene:
However, in order not to increase the calculation times too much, care must be taken not to apply the neon glass to double glazing.
Indeed, if you apply neon glass on a geometry with two sides, the neon light will be sent inwards, but also to the outside, and in addition to the two faces, thus generating useless calculations:
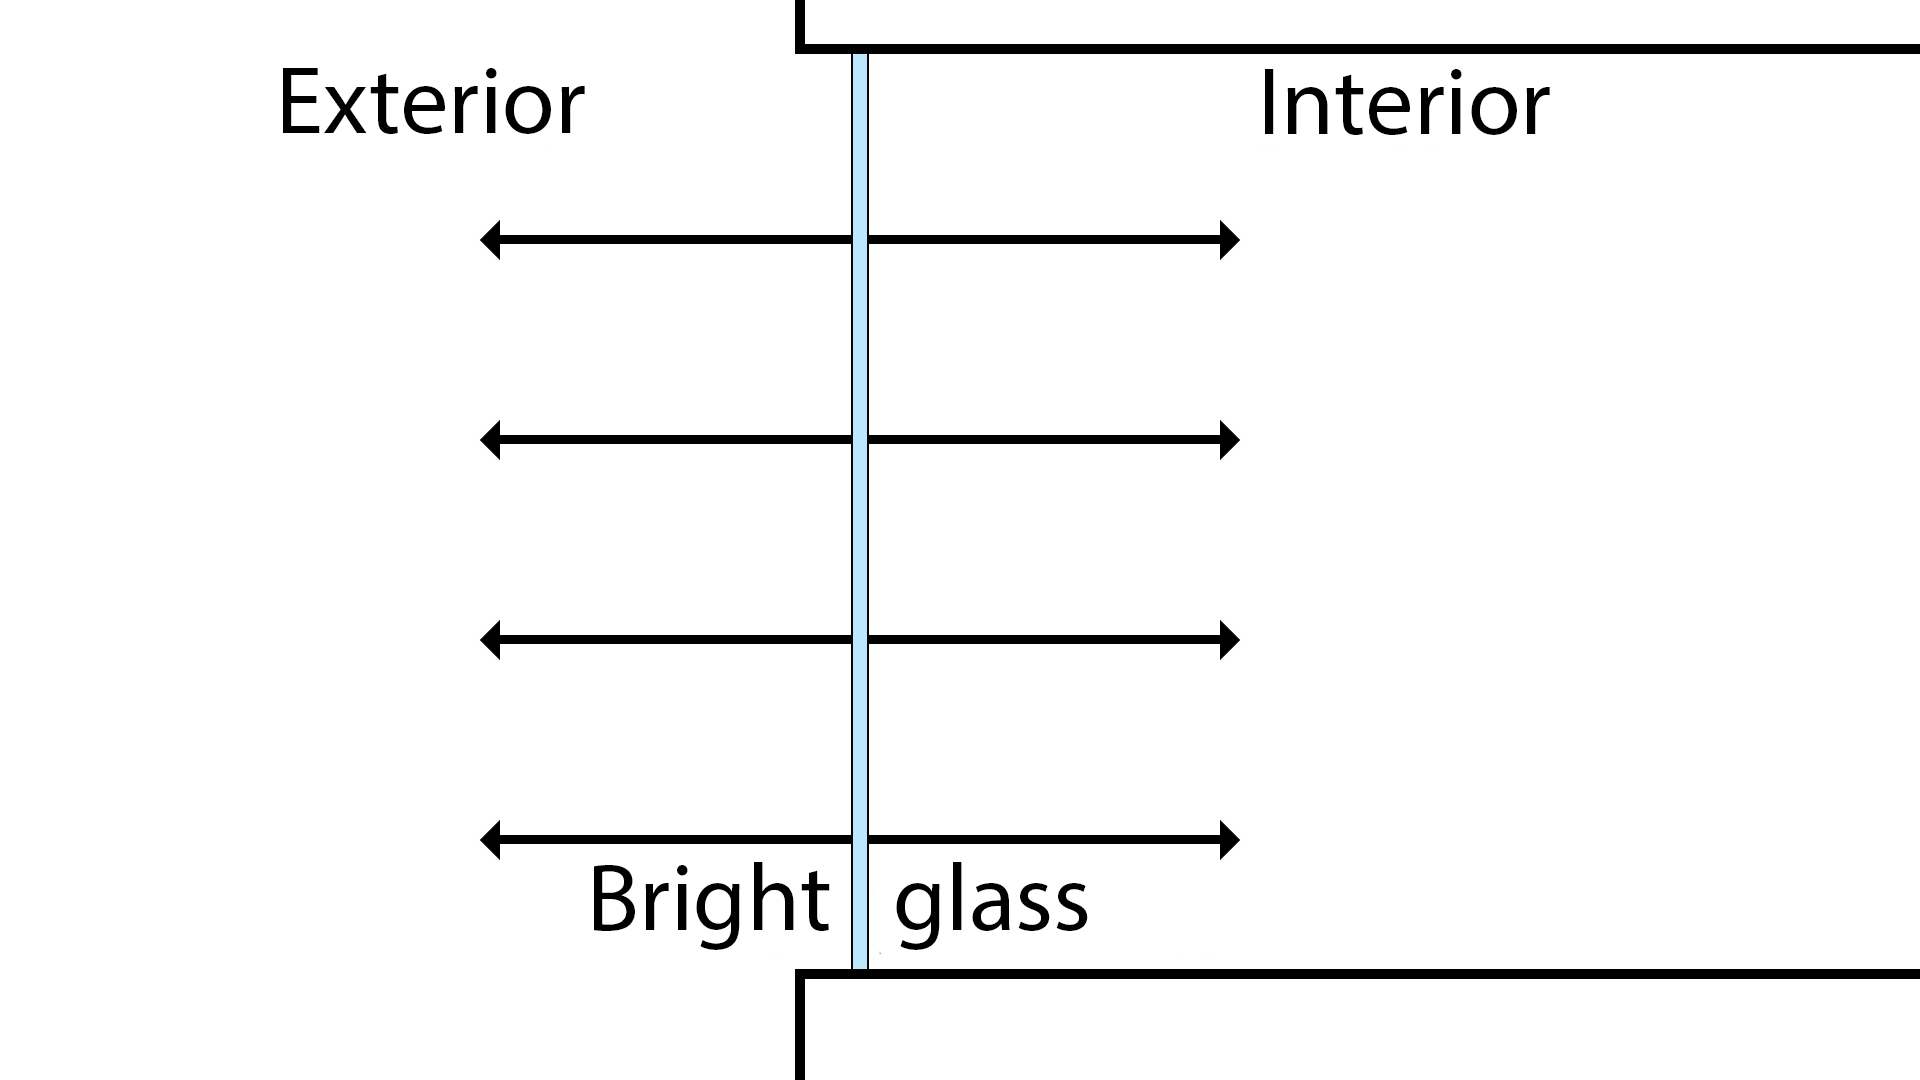
The solution to limiting the calculation times, if the model has double glazing, is to reassign a new material to the inner pane, to apply the neon glass only on this material and to use glass on the rest of the geometry of the window.
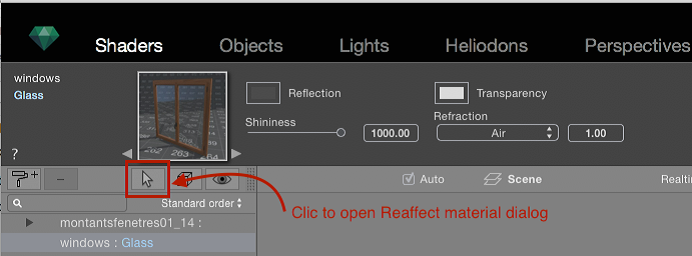
To reassign the material of the inner pane, it is necessary to activate the Shaders Inspector to select the material of the pane in the list and to open the dialog “Reaffect material”:
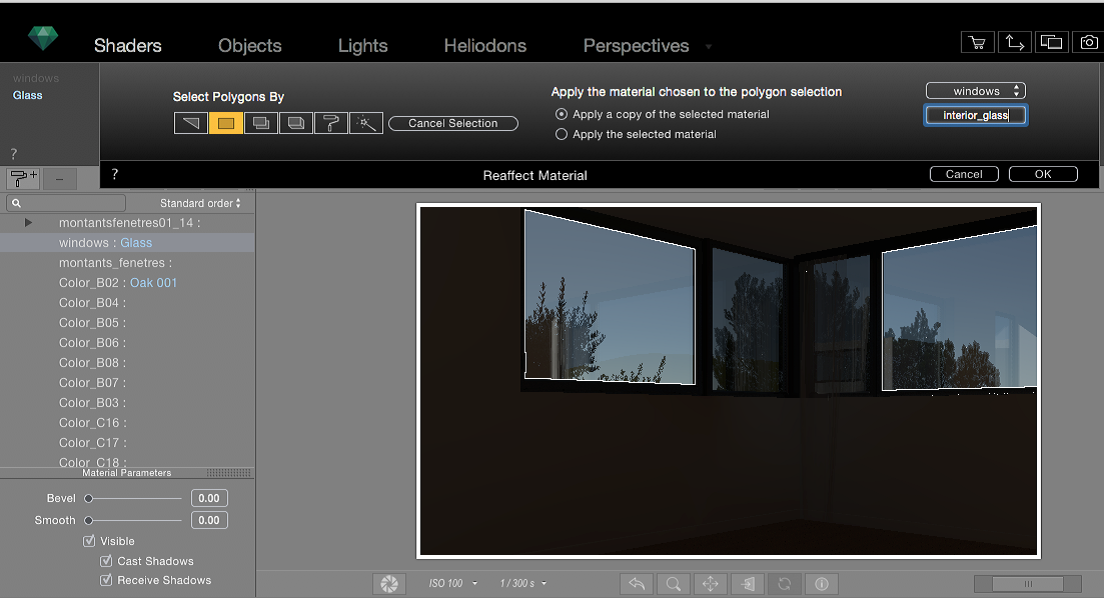
Activate the selection mode by facet, select the inner pane, rename the copy of the material, confirm with OK:
Drag the Neon Glass shader onto the new material and set the desired Lumen value:

Tip: To limit the calculation time, do not apply the “Neon Glass” shader on double glazing.